



Pull every book off a bookcase and you are left with the most ignored rectangle in the room: a flat, builder-white back panel that nobody chose and everybody looks at. Learning how to cover a bookshelf with contact paper fixes that in an afternoon, with self-adhesive sheets that are designed to come off suitable surfaces again when your taste changes. This guide covers the whole unit: which parts are worth covering, what to check on the back panel first, the step-by-step for bays and loose shelves, and how many 11 by 16 inch sheets a case takes.
Which parts of a bookshelf are worth covering
A bookcase has three kinds of surface worth thinking about, and they do not all deserve the same treatment. The outer sides are usually seen edge-on, so skip them unless one is a focal point.
- The back panel. Highest impact, lowest wear. Nothing slides across it, and it shows between every object you place. If you only cover one thing, cover this.
- The shelf decks. Books drag across a deck every time you pull one out, and a paper face will show that traffic sooner than paint or laminate. Many people cover only the back and let the bare shelves frame the print.
- The front edges. A narrow band along the lip of each shelf ties a plain case to a patterned back for very little paper.
One rule covers every part. Main Street lists sealed wood and painted drywall among the best surfaces for its sheets, and the product pages for the 11 by 16 inch Classic Sheets name "painted, sealed, and finished surfaces" as the application surface. The back panel is where that gets complicated.
Check the back panel before you buy anything
Bookcase backs come in three types, and the type decides whether this is a one-pack project or a reason to pause.
A finished back
Better solid-wood, plywood and MDF cases have a back painted or laminated to match the rest of the unit. Treat it like any finished surface: clean it, let it dry, and go.
A thin hardboard back
Flat-pack and budget cases almost always use a thin fiberboard back with a white or wood-look paper facing on the room side. The facing is usually smooth enough to work with, but it is not a finish Main Street lists, and a thin facing can lift with the sheet when you remove it. Run the hidden-corner test from the guide to lining wood shelves: press a scrap into a corner a book will hide, leave it a day, then peel it back and inspect both the sheet and the board.
No back at all
Some open shelving units have no back; you see the wall through them. Paper the wall behind the unit instead. Painted drywall is one of the brand's best-rated surfaces. If that wall was painted recently, Main Street says to wait at least four weeks before applying.
Remove the back or work in place?
A thin back that is nailed or stapled on can be pried off, papered flat and refitted, but prying bends hardboard and widens the nail holes. A glued or grooved back is better papered in place, which is what the next section covers.
How to cover a bookshelf with contact paper, step by step
Main Street's own how-to page lists the kit: a measuring tape and pencil, a utility knife, a damp cloth and a smoothing tool. Add a straight edge and a level.
- Empty the case and pull the adjustable shelves. Shelves on pegs lift out; fixed shelves stay and divide the back into bays.
- Clean the back. Wipe it with a damp cloth, then with the 30 percent isopropyl alcohol and 70 percent water mix the brand recommends, and let it dry completely.
- Measure each bay separately. Budget cases are rarely square, so measure width and height at both ends of every bay and use the larger numbers.
- Plan the layout before you cut. A Classic Sheet is 11 by 16 inches. In a bay around 12 inches tall, run the 16 inch side horizontally for fewer seams; in a tall bay, run it vertically. Dry-fit with the backing on to see where seams fall and where a motif will be chopped.
- Cut on the back, against a straight edge. Mark the backing paper, draw the knife through slowly, cut a touch oversized on the edge you will trim in place, and keep a factory edge for the seam.
- Draw a guideline with the level, not the shelf, because shelves sag and cases lean. For most bays the first sheet goes in the top corner against one side.
- Peel a few inches, align, press. Peel back the first few inches of backing, set the top edge on your line and press firmly. Pull the backing away a little at a time while pushing air out toward the free edge with the smoothing tool, the motion the brand's how-to page describes.
- Butt the next sheet to the first. Slide the factory edge of sheet two up to sheet one until the pattern lines up, then press from the seam outward. A dense allover print hides a slight mismatch; a stripe or grid does not.
- Trim at the sides and shelf. Press the sheet into the crease where the back meets the side or shelf, then run a fresh blade along it, angled slightly into the corner.
- Refit the shelves and wait a day before loading books, so nothing drags across a seam that has not fully settled.
If a bay fights you, the guide to applying contact paper without bubbles goes deeper on seams and lifting corners.
Wrapping a loose shelf, deck and front edge
If you want a shelf covered as well, do it out of the case. Cut one piece long enough to cover the top, fold over the front edge and turn under about an inch on the underside. Stick the top first, back to front, then crease the sheet over the front edge and press it under. At the two front corners, cut a small notch so the fold lies flat; the corner guide shows it. Leave the back edge and most of the underside bare, since that is where the shelf rests on its pegs. A wrapped deck takes the wear described above, so a darker, busier print hides scuffs better there.
How many sheets a bookcase takes
Each Classic Sheet covers 176 square inches, which the product pages round to 1.22 square feet, and a 12-pack comes to roughly 14.6 square feet. Measure the back in inches, multiply width by height, divide by 176, round up, and add a sheet or two for trimming.
- A five-shelf case about 31 inches wide and 71 inches tall has a back of roughly 2,200 square inches: 13 sheets before waste, so two 12-packs, with sheets left over for front edges.
- A cube unit is the awkward one. A typical cube is about 13 inches square, wider than a sheet's short side, so plan one sheet per cube plus a 2 to 3 inch strip; one extra sheet yields about five strips.
Buy the whole project at once: the product pages note that slight color variations can occur in the printing process, and a shade shift between packs shows on one continuous back.
Choosing a pattern for a bookcase back
You are choosing a backdrop, not a feature wall. Objects with strong silhouettes, a white vase or a stack of books, read best against a mid-scale, evenly spread print that is quieter than the objects. Founder Jan McCallum trained as an oil painter, and that habit of composing foreground against background runs through the collection.
A few in-stock sheets that suit the job:
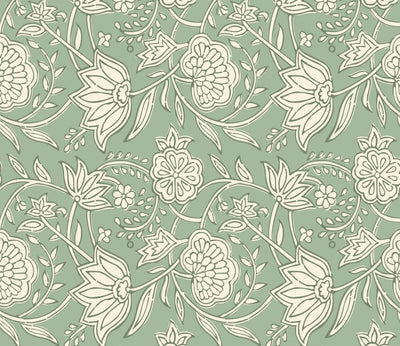
- Block Print Floral: a sage and cream allover that forgives seams and lets ceramics and greenery do the talking. It is the pattern in the photo at the top of this article.
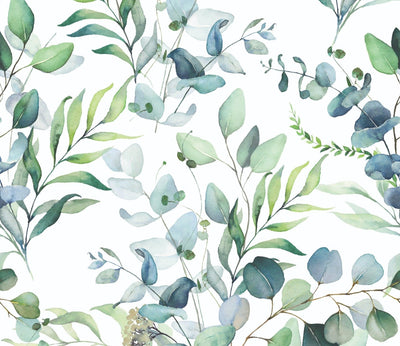
- Eucalyptus: watercolor leaves on white, airy enough for a case full of books.
- Wood Slat Panel: vertical slats that make a flat-pack case look built in, especially behind a few sculptural objects.
- Neutral Palm: a soft, large-leaf print for a bay that holds one or two things rather than twenty.
- Toile Forest: a line-drawn scene that rewards a close look, good for a reading-nook case at eye level.
For a case with fixed shelves, start each bay's first sheet at the same point in the repeat, measured from one datum such as the top of the case, so the shelves read as if laid over one uninterrupted field. More on pattern scale, including when to treat the shelf edge as a band, is in the DIY shelf liner ideas article.
Frequently asked questions
Can you use shelf liner on the back of a bookcase?
Yes, if it is an adhesive liner and the back is a finished surface. Non-adhesive liner has nothing to hold it on a vertical panel and will slide down. Main Street's 11 by 16 inch sheets are self-adhesive paper intended for painted, sealed and finished surfaces, which covers most laminated and painted backs; a bare hardboard back needs the corner test first.
What do you use to line bookshelves?
For the back panel, a self-adhesive decorative sheet in a mid-scale print is the usual choice because it stays put on a vertical surface and trims cleanly at the edges. For the decks, either the same sheet wrapped over the front edge or nothing at all, since decks take the wear from sliding books.
How do you cover a bookshelf without removing the back?
Treat each bay as its own small wall. Pull any adjustable shelves, clean and dry the back, measure the bay at both ends, cut sheets slightly oversized, apply from a level guideline in one top corner, butt seams on a factory edge, and trim in the crease where the back meets the sides and shelf with a sharp utility knife.
Will contact paper stick to the cardboard back of a bookcase?
Often, but a paper-faced hardboard back is not a surface the brand lists, and a thin facing can tear away when the sheet is removed. Test a scrap in a hidden corner for a day before covering the panel. If the facing lifts, paper the wall behind an open unit instead, or cover only the shelves and edges.
Does the paper come off a bookcase later?
The product pages say the Classic Sheets are designed to peel off cleanly from suitable walls, and painted or laminated cases are the best candidates. Removal still depends on the finish underneath, so there is no blanket guarantee; the hidden-corner test shows what your specific case will do before the whole back is committed.
Featured in this article
Shop the wallpapers mentioned above.

Block Print Floral Peel & Stick Wallpaper Sheets – 12 Pack
$31.00
Eucalyptus Peel & Stick Wallpaper Sheets – 12 Pack
$31.00
Wood Slat Panel Peel & Stick Wallpaper Sheets – 12 Pack
$31.00
Neutral Palm Peel & Stick Wallpaper Sheets – 12 Pack
$31.00
Toile Forest Peel & Stick Wallpaper Sheets – 12 Pack
$31.00
How to Cover a Bookshelf With Contact Paper: Back Panel, Shelves and Edges

Can You Write on Contact Paper? Markers, Pens and Chalk, Sorted

Can You Seal Contact Paper? Polyurethane, Epoxy and Clear Coats, Explained

Can You Use Contact Paper With a Cricut? Cut Settings, Mats and the Transfer Tape Question

How to Cover a Cardboard Box With Contact Paper, Lid Included


