
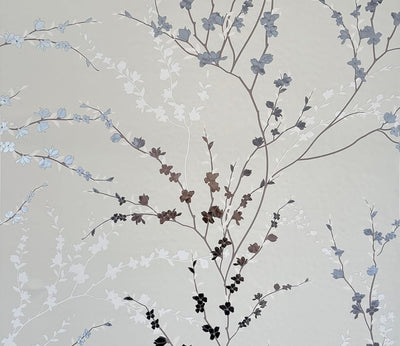

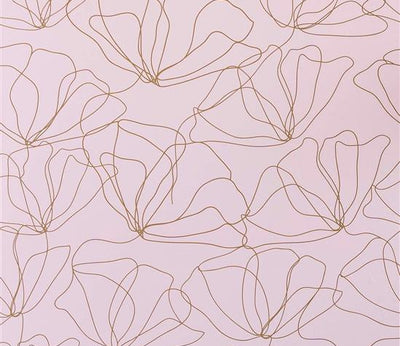
An open white dresser drawer holding folded mustard, olive and cream knit sweaters, with the outside of the drawer box covered in a coral, blush and peach chevron print.
MS Creations

Wrapping Paper as Drawer Liner: How to Do It, and When Not To

Main Street8 MIN READ

Somewhere in your closet there is probably the end of a roll of wrapping paper, too short for anything boxed and too pretty to throw out. Using wrapping paper as drawer liner is one of the oldest tricks for a reason: it costs nothing, it comes in endless prints, and it turns the inside of a plain drawer into something you actually enjoy opening. It also has real limits, and they show up within a few weeks if you ignore them.

Can you use wrapping paper as drawer liner?

Yes, with one condition: treat it as a loose liner, not a permanent one. Wrapping paper is made to fold around a box once and be torn off, so it is thin, it often has a curl from the roll, and it tears where a heavy object gets dragged across it. Under folded sweaters, scarves or linens, none of that matters much: nothing scrapes it, and when it gets tired you swap it in two minutes.

Where it struggles is the busy drawer. Cutlery, tools and chargers slide and catch, and a thin sheet with nothing holding it down wrinkles toward the back within days. Our guide on how to keep shelf liner in place explains why loose sheets creep, and the same physics applies here.

One more line worth drawing early: wrapping paper is not made for food contact. In a kitchen drawer, keep anything you eat in its own packaging or a container rather than sitting directly on the print.

How to line drawers with wrapping paper so it stays flat

A liner that looks deliberate comes down to fit. Here is the order that works.

  1. Empty and clean the drawer. Vacuum the corners, wipe the bottom with a barely damp cloth, and let it dry completely. Paper laid over damp wood will cockle.
  2. Make a template. Press a sheet of plain paper into the drawer, crease it along the inside edges, and cut along the creases. Old drawers are rarely square, and a template catches that before you cut the good paper.
  3. Flatten the wrapping paper. Roll it the opposite way for a minute, or lay it print side down under a few books overnight. A curl you ignore now will lift the front edge later.
  4. Trace and cut slightly small. Aim for about an eighth of an inch inside the template on every side. A sheet that fits exactly will buckle against the drawer walls.
  5. Back it if the paper is flimsy. This is the step most people skip. Wrap the print around a piece of thin card, such as poster board or an opened file folder cut to the template, and tape the overlap on the underside. You now have a stiff insert that lies flat, resists sliding and lifts out in one piece for cleaning.

If you want it to stay put without a backer, a few small pieces of removable tape at the corners will help. Test the tape on a hidden spot first, because some adhesives leave a mark on raw or older wood.

Scrapbook, parchment, tissue and newspaper: how the other papers compare

Scrapbook paper

Heavier than most wrapping paper and usually sold in 12 x 12 in squares, scrapbook paper suits small drawers, such as jewelry or desk drawers, and lies flatter on its own. The catch is size. A dresser drawer will need several squares butted together, so pick a small allover print where the seams disappear into the pattern.

Parchment paper

Parchment is paper with a silicone coating, which makes it slick and nonstick. That is useful in a kitchen drawer where crumbs collect, since you can lift the sheet and tip it into the bin. The same coating means most tape grips the top surface poorly, so cut it to fit snugly and let it rest.

Tissue paper

Tissue has almost no body and moves with every garment, so it is a wrap rather than a liner. If you are storing heirloom linens or a christening gown, museum textile guides commonly suggest unbuffered acid-free tissue around the fabric and a barrier layer between the textile and bare wood, though practice varies. For anything genuinely precious, ask a conservator rather than relying on a blog post, ours included.

Newspaper

Lining dresser drawers with newspaper is an old habit, and the paper least suited to the job. Newsprint is high in lignin, which library preservation guides link to yellowing and brittleness over time, and the ink can rub off onto hands and pale fabric. Use it as a template, not a liner.

Where a loose paper liner beats a sticky one

Some drawers are better off with loose paper, even with a self-adhesive sheet on hand.

  • Raw wood drawer bottoms. Many dresser drawers have unfinished bottoms. Main Street lists sealed wood among the best surfaces on our how-to-use page, and unsealed wood is not on that list, so a loose liner is the gentler option there.
  • Antique or borrowed furniture. If the piece matters to you, or belongs to someone else, anything that does not stick is the lower-risk choice.
  • Drawers you redo often. A nursery dresser that changes with the season, or a craft drawer you rearrange every month, suits a liner you can swap without peeling anything.

Our article on closet and dresser liners goes further into what a liner does for clothes in a dresser, if you are still deciding whether to bother.

When a self-adhesive paper sheet is the better drawer liner

Switch when loose paper starts working against you: a drawer you open many times a day, contents that slide, or a wrinkled liner that is the first thing a guest sees.

A peel and stick paper sheet solves the sliding problem at the root, because the whole back is adhesive. Main Street's Classic Sheets are paper wallpaper sheets measuring 11 x 16 in, about 1.22 sq ft each, and the product pages list the application surface as painted, sealed and finished surfaces. That describes many kitchen drawers and plenty of newer furniture, but check what your drawer is actually made of first. A few practical notes from our own guide:

  • Clean the drawer with a mix of 30% isopropyl alcohol and 70% water, then let it dry fully.
  • If you painted the drawer recently, Main Street recommends waiting at least 4 weeks before applying.
  • Have a utility knife and a smoothing tool ready. Peel back a few inches of backing, align the edge, and smooth as you go.
  • Buy every sheet you need at once. Many of our 12-pack pages note that slight color variations can occur from the printing process.

Sizing is simple. A drawer bottom up to 11 x 16 in takes one sheet. A 15 x 22 in kitchen drawer takes two, placed side by side. A 30 x 16 in dresser drawer takes three. If you want to see what different print scales look like inside a small box first, our piece on decorative drawer liners walks through pattern scale.

For a drawer of soft knits, a lively print like Total Vibes gives the inside some personality. For a cutlery or junk drawer, a busy small-scale pattern such as Floral Sprinkles or Eucalyptus hides scuffs and seams. And if you like the calm of plain white parchment but want it to look finished, Carrara Marble reads clean without being blank.

One limit to respect: Main Street's paper sheets belong in dry drawers. Our how-to-use guide lists areas exposed to moisture, such as bathrooms, showers and wet zones, among the places to avoid, so the drawer under a sink is not the spot for them.

A middle path: keep the paper, upgrade the method

You do not have to choose one approach for the whole house. Founder Jan McCallum is a classically trained oil painter, and painters learn early to decide where the eye lands first. The same idea works for a chest of drawers. Spend the self-adhesive sheets on the drawers you open daily, like the top dresser drawer or the utensil drawer, and use backed wrapping paper in the deep drawers of out-of-season clothes. A print like Peony Party in the drawers you show off, and the leftover wrapping roll in the ones you do not, is a perfectly sensible split.

Frequently asked questions

Is wrapping paper OK for drawers that hold clothes?

Generally, yes. Folded clothes are soft and do not drag across the paper, so a loose wrapping paper liner holds up well in a dresser. Make sure the drawer is completely dry before you lay it in, flatten the curl first, and replace the sheet if it starts to tear. For heirloom or delicate textiles, ask a textile conservator about acid-free materials instead.

How do you keep wrapping paper drawer liner from sliding?

Give it some body. Wrap the paper around a piece of thin card cut to the drawer's template and tape the overlap underneath, so you have a stiff insert that lies flat. A few small pieces of removable tape at the corners also help, but test them on a hidden spot first, since some tapes mark raw wood.

Is scrapbook paper good for lining drawers?

For small drawers, it is one of the better household options. It is heavier than wrapping paper, so it lies flat more readily, and the usual 12 x 12 in squares fit jewelry, desk and vanity drawers neatly. Larger drawers need several squares, so choose a small allover print that hides where the pieces meet.

Can you line drawers with parchment paper?

You can, and it works best in kitchen drawers where crumbs collect. Parchment is silicone coated, so it is slick and easy to lift out and shake clean. That coating also means most tape will not grip the surface well, so cut each sheet to fit snugly and let it rest in place rather than trying to fix it down.

Can you turn wrapping paper into contact paper?

In principle, by backing it with a double-sided adhesive sheet, but you are rebuilding a product the hard way, and the result depends entirely on that adhesive. Thin wrapping paper also wrinkles easily once glue is involved. If you want the print to stick, starting with a peel and stick paper sheet is simpler and more predictable.

MAIN STREET

Featured in this article

Shop the wallpapers mentioned above.

Learn & Inspire

A white wooden serving tray with gold metal handles, its base lined with dark grey crocodile-embossed paper, set on a dark woven mat in front of a brick wall.
Posted By Main Street

How to Cover a Cardboard Box With Contact Paper, Lid Included

The box a pair of shoes came in is roughly the right size for most of the small things that pile up on a shelf, which is why so many of those boxes never make it to the recycling. Covering a cardboard box with contact paper turns that pile into storage you would leave in plain view, for a sheet or two per box. Below is how to cover a cardboard box with contact paper so the corners stay crisp, the lid still fits and the paper stays put, plus which boxes are worth the effort. Does contact paper stick to cardboard? Yes, and it holds better on some boxes than others. Self-adhesive paper grips smooth surfaces, so a shoebox or gift box with a coated, slightly glossy face is the easy case: the paper goes down flat and stays there. Raw corrugated cardboard, the brown kraft kind shipping boxes are made of, is more absorbent and slightly fuzzy, so the adhesive has less to grab. It still works, but press harder and test a corner first, as our surface-by-surface guide to what contact paper sticks to explains. One thing to know before you start: Main Street's guidance for its 11 by 16 inch wallpaper sheets names painted, sealed and finished surfaces, and cardboard is not on that list. The paper grips coated box board well, but the bond is a one-way trip. Peel it off a kraft box and the top layer of the cardboard often comes with it, so treat a covered box as covered for good. What you need to cover a box with contact paper Main Street's own how-to guide lists a measuring tape and pencil, a utility knife, a damp cloth and a smoothing tool. A box project adds a few things from the kitchen drawer. Self-adhesive sheets. The 11 by 16 inch wallpaper sheets cover 1.22 square feet each. A box the size of an adult shoebox, roughly 13 by 8 by 5 inches, takes about four sheets including the lid, but measure yours before you count. A utility knife, scissors and a straightedge. The knife for trimming against the box edge, the scissors for corner slits, the straightedge for cutting panels square. A smoothing tool or an old gift card for pushing air toward the edges and pressing paper into corners. A damp cloth. Cardboard holds dust, and dust is what makes edges lift later. Pattern matters more on a box than on a wall, because a box is small and you see the whole thing at once. A fine, all-over print such as Woven Stripe forgives a seam at the corner and reads as a set when several boxes line up on an open shelf. A large motif works too, as long as you plan where it lands on the lid. How to cover a cardboard box with contact paper, step by step Because the sheets are 11 by 16 inches, the cleanest method covers one face at a time and puts every seam on a corner, where the eye expects an edge anyway. Prep the box. Pull off tape and labels, press down lifted flaps and glue a loose corner if one has split. Wipe every face with a slightly damp cloth and let it dry fully. Measure each face, then add margins. For a side panel, measure its width and height. Add about half an inch to the width to wrap around one corner, and an inch top and bottom to fold over the rim and under the base. Write each measurement on the backing in pencil. Cut with the backing on. Lay the sheet face down, mark the panel on the backing and cut along the straightedge. Cutting before you peel is what keeps the edges straight. Apply the first long side. Peel back only an inch or two of backing. Line the panel up so the extra half inch overhangs one corner and the margins overhang top and bottom. Press the exposed strip down, then pull the backing away a little at a time while you smooth from the center outward. Turn the corner. Run the smoothing tool firmly into the corner so the paper creases on the edge, then fold the half-inch overhang onto the next face and press it flat. Cover the remaining sides. The next panel's cut edge sits right on the corner line, over that half-inch wrap. Work around the box this way until the last two wraps meet at the final corner. Fold the margins. At the bottom, snip a short slit at each corner, fold the long-side margins under first, then the short ones, like wrapping a gift. At the top of an open box, fold the margin over the rim and press it down inside. Our guide to covering a book with contact paper uses the same fold-and-tuck logic on a smaller scale, and the same rule applies here: cut generously, then trim. Corners, lids and handle holes: the three spots that go wrong Corners Most lumpy corners come from folding two layers of paper over each other at a right angle. The fix is a slit. Where a margin has to turn a corner, cut from the edge of the paper straight in to the corner of the box, fold one flap down, then fold the other over it. Each flap lies flat instead of bunching. For rounded box corners, and for inside and outside corners on furniture, see how to do corners with contact paper. Lids The lid is where a box can stop closing. Paper adds a little thickness, and a snug lid has no room to spare. Cover the lid top and its outer sides, but leave the inside of the lid rim bare so it still slides over the box. On a box that lives in a cubby, consider covering only the lid and the front face, which is all anyone sees. Handle holes Archive boxes often have cut-out handles. Cover straight over the hole, then from inside the box cut an X through the paper from corner to corner of the opening. Fold the four flaps through to the inside and press them down, so the cut edge ends up where fingers will not catch it. Lining the inside of a box, or a tray A lined interior is the detail that makes a box feel finished rather than disguised, and it is easier than the outside because nothing has to wrap. Measure the base and each inside wall separately, cut each panel a hair under size so it drops in without buckling, and press from the center outward. A keepsake box with a floral such as Block Print Floral inside the lid is a small, cheerful surprise every time it opens. These wallpaper sheets are paper, so keep lined boxes away from anything damp. The same method lines the base of a wooden tray, which is what the photo at the top of this article shows. For a tray that will see the occasional cup, Main Street's embossed foil craft sheet Very Crock N Roll is the one to reach for: its product page lists it as water-resistant and suited to functional crafts, which the regular wallpaper sheets are not. It measures 10 by 15 inches, so check the tray base against that before you order. Which boxes to cover, and which to leave alone Shoeboxes and gift boxes with a coated face. The best candidates: rigid, smooth and already box-shaped. A row of them in one print, something like Herringbone, reads as a matched set rather than a collection of leftovers. Kraft shipping boxes. Fine for a closet shelf once the flaps are taped flat, but press every edge firmly and expect a lighter grip than on a coated box. Boxes that need to fold flat again. Skip these. Paper across a fold line tends to crack or lift at the crease the first time the box collapses. Boxes going somewhere damp. Also skip. Main Street's guide lists moisture-exposed areas among the places to avoid for its wallpaper sheets, and a cardboard box under a sink will fail before the paper does. Once the boxes are covered, label them. A panel cut from a sheet of Chalkboard Classic and stuck to the front face takes chalk or a chalk marker and wipes clean when the contents change, which beats a strip of masking tape. For more small projects that use up a sheet or two, see our guide to craft wallpaper. Frequently asked questions Will contact paper stick to a cardboard box? Yes. Self-adhesive paper holds well on smooth, coated box board, the kind shoeboxes and gift boxes are made of. Raw corrugated kraft is more absorbent, so the grip is lighter; press firmly and test a corner first. Main Street's surface guidance names painted, sealed and finished surfaces, so a cardboard box is a project you do with that in mind. How do you cover a box with contact paper without bubbles? Peel only an inch or two of backing at a time and smooth from the center of the panel toward the edges as you go, so air is pushed out ahead of the adhesive. If a bubble is trapped after the panel is down, lift the nearest edge and relay it, or prick the bubble with a pin and press the air out through the hole. Can you cover a shoebox with contact paper? A shoebox is the ideal first project: rigid, smooth and small enough that about four 11 by 16 inch sheets cover the base and lid. Cover the lid top and outer sides but leave the inside of the lid rim bare so it still slides on, and put your seams on the corners, where the eye expects an edge anyway. How many sheets does it take to cover a box? Measure each face, add about half an inch on one side for the corner wrap and an inch top and bottom for folding, then see how many of those panels fit on an 11 by 16 inch sheet. A typical adult shoebox with its lid comes to about four sheets. Count before you cut, because offcuts rarely rescue a panel that came up short. Can you remove contact paper from cardboard? You can peel it, but the result is rarely tidy. On kraft cardboard the top layer of the board often comes away with the paper, and on coated board the surface can scuff. Think of a covered box as permanently covered. If you want a reversible look, cover only the lid, or slip a loose printed panel inside a clear box sleeve instead.
An open white dresser drawer holding folded mustard, olive and cream knit sweaters, with the outside of the drawer box covered in a coral, blush and peach chevron print.
Posted By Main Street

Wrapping Paper as Drawer Liner: How to Do It, and When Not To

Somewhere in your closet there is probably the end of a roll of wrapping paper, too short for anything boxed and too pretty to throw out. Using wrapping paper as drawer liner is one of the oldest tricks for a reason: it costs nothing, it comes in endless prints, and it turns the inside of a plain drawer into something you actually enjoy opening. It also has real limits, and they show up within a few weeks if you ignore them. Can you use wrapping paper as drawer liner? Yes, with one condition: treat it as a loose liner, not a permanent one. Wrapping paper is made to fold around a box once and be torn off, so it is thin, it often has a curl from the roll, and it tears where a heavy object gets dragged across it. Under folded sweaters, scarves or linens, none of that matters much: nothing scrapes it, and when it gets tired you swap it in two minutes. Where it struggles is the busy drawer. Cutlery, tools and chargers slide and catch, and a thin sheet with nothing holding it down wrinkles toward the back within days. Our guide on how to keep shelf liner in place explains why loose sheets creep, and the same physics applies here. One more line worth drawing early: wrapping paper is not made for food contact. In a kitchen drawer, keep anything you eat in its own packaging or a container rather than sitting directly on the print. How to line drawers with wrapping paper so it stays flat A liner that looks deliberate comes down to fit. Here is the order that works. Empty and clean the drawer. Vacuum the corners, wipe the bottom with a barely damp cloth, and let it dry completely. Paper laid over damp wood will cockle. Make a template. Press a sheet of plain paper into the drawer, crease it along the inside edges, and cut along the creases. Old drawers are rarely square, and a template catches that before you cut the good paper. Flatten the wrapping paper. Roll it the opposite way for a minute, or lay it print side down under a few books overnight. A curl you ignore now will lift the front edge later. Trace and cut slightly small. Aim for about an eighth of an inch inside the template on every side. A sheet that fits exactly will buckle against the drawer walls. Back it if the paper is flimsy. This is the step most people skip. Wrap the print around a piece of thin card, such as poster board or an opened file folder cut to the template, and tape the overlap on the underside. You now have a stiff insert that lies flat, resists sliding and lifts out in one piece for cleaning. If you want it to stay put without a backer, a few small pieces of removable tape at the corners will help. Test the tape on a hidden spot first, because some adhesives leave a mark on raw or older wood. Scrapbook, parchment, tissue and newspaper: how the other papers compare Scrapbook paper Heavier than most wrapping paper and usually sold in 12 x 12 in squares, scrapbook paper suits small drawers, such as jewelry or desk drawers, and lies flatter on its own. The catch is size. A dresser drawer will need several squares butted together, so pick a small allover print where the seams disappear into the pattern. Parchment paper Parchment is paper with a silicone coating, which makes it slick and nonstick. That is useful in a kitchen drawer where crumbs collect, since you can lift the sheet and tip it into the bin. The same coating means most tape grips the top surface poorly, so cut it to fit snugly and let it rest. Tissue paper Tissue has almost no body and moves with every garment, so it is a wrap rather than a liner. If you are storing heirloom linens or a christening gown, museum textile guides commonly suggest unbuffered acid-free tissue around the fabric and a barrier layer between the textile and bare wood, though practice varies. For anything genuinely precious, ask a conservator rather than relying on a blog post, ours included. Newspaper Lining dresser drawers with newspaper is an old habit, and the paper least suited to the job. Newsprint is high in lignin, which library preservation guides link to yellowing and brittleness over time, and the ink can rub off onto hands and pale fabric. Use it as a template, not a liner. Where a loose paper liner beats a sticky one Some drawers are better off with loose paper, even with a self-adhesive sheet on hand. Raw wood drawer bottoms. Many dresser drawers have unfinished bottoms. Main Street lists sealed wood among the best surfaces on our how-to-use page, and unsealed wood is not on that list, so a loose liner is the gentler option there. Antique or borrowed furniture. If the piece matters to you, or belongs to someone else, anything that does not stick is the lower-risk choice. Drawers you redo often. A nursery dresser that changes with the season, or a craft drawer you rearrange every month, suits a liner you can swap without peeling anything. Our article on closet and dresser liners goes further into what a liner does for clothes in a dresser, if you are still deciding whether to bother. When a self-adhesive paper sheet is the better drawer liner Switch when loose paper starts working against you: a drawer you open many times a day, contents that slide, or a wrinkled liner that is the first thing a guest sees. A peel and stick paper sheet solves the sliding problem at the root, because the whole back is adhesive. Main Street's Classic Sheets are paper wallpaper sheets measuring 11 x 16 in, about 1.22 sq ft each, and the product pages list the application surface as painted, sealed and finished surfaces. That describes many kitchen drawers and plenty of newer furniture, but check what your drawer is actually made of first. A few practical notes from our own guide: Clean the drawer with a mix of 30% isopropyl alcohol and 70% water, then let it dry fully. If you painted the drawer recently, Main Street recommends waiting at least 4 weeks before applying. Have a utility knife and a smoothing tool ready. Peel back a few inches of backing, align the edge, and smooth as you go. Buy every sheet you need at once. Many of our 12-pack pages note that slight color variations can occur from the printing process. Sizing is simple. A drawer bottom up to 11 x 16 in takes one sheet. A 15 x 22 in kitchen drawer takes two, placed side by side. A 30 x 16 in dresser drawer takes three. If you want to see what different print scales look like inside a small box first, our piece on decorative drawer liners walks through pattern scale. For a drawer of soft knits, a lively print like Total Vibes gives the inside some personality. For a cutlery or junk drawer, a busy small-scale pattern such as Floral Sprinkles or Eucalyptus hides scuffs and seams. And if you like the calm of plain white parchment but want it to look finished, Carrara Marble reads clean without being blank. One limit to respect: Main Street's paper sheets belong in dry drawers. Our how-to-use guide lists areas exposed to moisture, such as bathrooms, showers and wet zones, among the places to avoid, so the drawer under a sink is not the spot for them. A middle path: keep the paper, upgrade the method You do not have to choose one approach for the whole house. Founder Jan McCallum is a classically trained oil painter, and painters learn early to decide where the eye lands first. The same idea works for a chest of drawers. Spend the self-adhesive sheets on the drawers you open daily, like the top dresser drawer or the utensil drawer, and use backed wrapping paper in the deep drawers of out-of-season clothes. A print like Peony Party in the drawers you show off, and the leftover wrapping roll in the ones you do not, is a perfectly sensible split. Frequently asked questions Is wrapping paper OK for drawers that hold clothes? Generally, yes. Folded clothes are soft and do not drag across the paper, so a loose wrapping paper liner holds up well in a dresser. Make sure the drawer is completely dry before you lay it in, flatten the curl first, and replace the sheet if it starts to tear. For heirloom or delicate textiles, ask a textile conservator about acid-free materials instead. How do you keep wrapping paper drawer liner from sliding? Give it some body. Wrap the paper around a piece of thin card cut to the drawer's template and tape the overlap underneath, so you have a stiff insert that lies flat. A few small pieces of removable tape at the corners also help, but test them on a hidden spot first, since some tapes mark raw wood. Is scrapbook paper good for lining drawers? For small drawers, it is one of the better household options. It is heavier than wrapping paper, so it lies flat more readily, and the usual 12 x 12 in squares fit jewelry, desk and vanity drawers neatly. Larger drawers need several squares, so choose a small allover print that hides where the pieces meet. Can you line drawers with parchment paper? You can, and it works best in kitchen drawers where crumbs collect. Parchment is silicone coated, so it is slick and easy to lift out and shake clean. That coating also means most tape will not grip the surface well, so cut each sheet to fit snugly and let it rest in place rather than trying to fix it down. Can you turn wrapping paper into contact paper? In principle, by backing it with a double-sided adhesive sheet, but you are rebuilding a product the hard way, and the result depends entirely on that adhesive. Thin wrapping paper also wrinkles easily once glue is involved. If you want the print to stick, starting with a peel and stick paper sheet is simpler and more predictable.
A white built-in hutch with open shelves whose back panels are covered in a green and white leaf print, holding white and sage-green pitchers, plates, bowls, cups and small potted plants above closed white cabinet doors.
Posted By Main Street

Does Shelf Liner Attract Bugs? What Really Draws Pests to Your Shelves

Shelf liner does not pull bugs into a kitchen on its own. Ants, roaches and pantry moths come for food, water and a dark place to hide, and a liner only matters when it supplies one of those three. So does shelf liner attract bugs? Not by itself, but a badly fitted one can feed and shelter the bugs that are already coming. The useful question is which version you have on your shelves right now. What brings bugs into a cabinet in the first place University extension services agree on the short list. Pantry insects arrive in food packages or fly in, then stay because they find crumbs, spilled flour, open bags of rice or a forgotten box of pet kibble. Cockroaches need water as much as food, which is why they gather near leaking pipes and under sinks. Nearly every household pest prefers somewhere dark, tight and undisturbed to rest during the day. Look at your own shelves against that list: Food. Crumbs, sticky rings from syrup bottles, the dusting of sugar around a canister, paper and thin plastic bags that insects can chew through. Water. A slow drip under the sink, condensation on a cabinet that backs onto a dishwasher, a damp dish rack stored on a shelf. Shelter. Clutter, stacked paper bags, gaps along the back of a shelf, and any pocket a small insect can crawl into. A shelf liner sits right in the middle of that picture. It is not food in the way flour is, it is not a water source, and on a flat shelf it is not a hiding spot. Whether it stays that way depends on how it was installed and what you put on top of it. Does shelf liner attract bugs? Only in these two ways The pocket underneath Loose-laid liner, or adhesive liner with lifted corners, creates a thin space between the paper and the shelf. Crumbs slide in through the gap and stay there, out of sight, where no sponge reaches them. Cockroaches spend their days in cracks and crevices, and a curling edge along the back of a pantry shelf is exactly that kind of crevice. The liner did not attract the roach. It gave one a room with a snack bar. The fix is fit, not a different material. A liner pressed flat to the shelf, trimmed to the edges and kept down at the corners leaves nothing to crawl under. Our guide on how to keep shelf liner in place covers the slipping and lifting problems that create those pockets. Paper, paste and the insects that eat them This part deserves a straight answer, because the search results tend to skip it. Two common household insects are documented paper and starch eaters. Silverfish scrape at starchy materials such as glue, paste and paper, and they thrive in humid rooms. Older entomology bulletins describe cockroaches feeding on wallpaper paste and on the glue in book bindings. Main Street's Classic Sheets are paper, listed on each product page as peel and stick paper wallpaper, and we do not publish a pest-resistance claim for them or for the adhesive on the back. Paper on a dry, clean shelf in a home without an infestation is simply not on the menu in any meaningful way. Paper in a damp cabinet in a home that already has silverfish is a different situation, and the answer is to fix the damp and the infestation, not to hunt for a different liner. Does contact paper attract roaches? Roaches go where the food and water are, and contact paper supplies neither unless it is trapping crumbs or holding moisture. The people who ask this question usually found roaches on or under a lined shelf and wondered whether the paper was the cause. In most cases the paper was simply where the evidence was visible. The roaches were already in the kitchen for the sink, the trash, the stove or the crumbs behind the toaster. That said, a few spots deserve extra caution with any self-adhesive paper: The cabinet under the sink. Skip it. Bare shelving there lets you spot a slow leak early, and Main Street lists areas exposed to moisture among the surfaces to avoid. Silverfish favor damp spaces, too. Shelves above a dishwasher or kettle station. Steam and condensation work their way under edges. Shelves where you already see droppings. Deal with the pests first. Lining over an active problem hides it. For everything else, a well-fitted liner on a dry shelf is neutral at worst. Our article on whether shelf liner protects cabinets explains the same line from the other direction: liners handle slow, dry wear, and they are the wrong tool for anything wet. Insect repellent shelf liner: a different product entirely Search for bug resistant shelf liner and you will find liners treated with an insecticide. These are pesticide products, not decorative paper, and they carry a pesticide label whose directions have to be followed. EPA-registered labels for treated shelf papers have included instructions not to place wrapped or unwrapped food or food utensils directly on the paper. Several university extension services also advise against using household pesticides in food storage areas at all, because of the risk of contaminating the food. If you have a real infestation, a pest professional or your local extension office is the right call. A liner of any kind, treated or not, is not a pest control plan. Main Street does not make treated liners. Our sheets are decorative paper, and we would rather tell you that plainly than let a product page imply something it cannot deliver. Line your shelves so pests have nowhere to hide Done well, lining a cupboard can make pest problems easier to catch. A clean, flat, light-colored surface shows you what a dark, worn shelf hides. Empty and vacuum first. Extension entomologists recommend vacuuming shelves and crevices rather than only wiping them, since a wet cloth can push crumbs deeper into cracks. Then follow Main Street's prep: a damp cloth, a solution of 30% isopropyl alcohol and 70% water, and a full dry. Check the surface. Main Street lists smooth tile, sealed wood and painted drywall as the best surfaces. If a shelf was recently painted, wait at least four weeks before applying, as the brand advises. Cut to the inside edges. Trim the sheet so it meets the back and sides of the shelf without curling up the wall. Our guide to lining kitchen shelves covers measuring a whole kitchen and the order to work in. Press every edge and seam. Use a smoothing tool along the perimeter. The edge is where crumbs get in. Pick a light ground. Crumbs, droppings and moth webbing stand out against a pale sheet. A dense dark pattern camouflages them. Decant dry goods. Extension services recommend glass, metal or rigid plastic containers with tight lids, since insects can chew through paper and thin plastic bags. Use older food first. On a light sheet, a monthly glance becomes a real inspection. Small dark specks that look like ground pepper, fine webbing in a corner, or a trail of ants along a seam are all easier to spot on a soft eucalyptus print than on bare, scuffed wood. Patterns that make crumbs easy to spot If inspection matters to you, choose for contrast. The hutch in the photo above uses All About Balance, a leafy print on a pale ground sold as 12 double panels, the equivalent of 24 sheets at 11 x 16 in, which is enough for a run of shelves. Eucalyptus is a soft watercolor of silver dollar leaves, gentle enough that anything sitting on it reads clearly. Carrara Marble gives a pantry a clean white look, and a stray grain of rice or a spill shows up against it quickly. Each 12-pack of Classic Sheets covers about 14.6 sq ft, at 1.22 sq ft per sheet. Check the product page for the pack you choose, since the larger packs list their own totals. For tips on the whole process, Main Street's how-to-use page lays out the steps and the surfaces to skip. Founder Jan McCallum trained as an oil painter, and the collections lean toward prints you would be happy to look at every time you open a cupboard. On a pantry shelf, that pleasure has a practical side. You notice a clean, pretty shelf, and you notice the moment it is not clean. Frequently asked questions Does shelf liner attract bugs? Not on its own. Bugs come for food, water and shelter, and a flat, well-fitted liner on a dry shelf supplies none of them. Problems start when edges lift and trap crumbs, or when paper sits in a damp cabinet. Fix the fit, keep the shelf dry, store food in sealed containers, and the liner stays neutral. Does contact paper attract roaches? Roaches follow food and water, and contact paper offers neither unless it is hiding crumbs or holding moisture. Lifted edges create the crevices roaches like to rest in, so keep every edge pressed down. If you find roaches on a lined shelf, treat the infestation first. The paper usually just made the evidence easier to see. Is there a shelf liner that repels bugs? Insecticide-treated shelf liners exist, but they are pesticide products with labels you must follow, and treated papers have typically carried warnings against placing food or utensils directly on them. Extension services generally discourage pesticides in food storage areas. Main Street's sheets are decorative paper with no pest-repelling claim. Do silverfish eat shelf paper? Silverfish feed on starchy materials such as paper, glue and paste, and they prefer humid spaces. Any paper liner could interest them in a damp cabinet with an existing infestation. The fix is lowering humidity and dealing with the insects. On a dry shelf in a home without silverfish, a paper liner is not a meaningful attraction. Should I line the cabinet under my sink? We would skip it. Bare shelving under a sink lets you catch a slow leak before it spreads, and damp conditions draw roaches and silverfish alike. Main Street also lists areas exposed to moisture among the surfaces to avoid for its sheets. Save the paper for dry shelves and drawers elsewhere in the kitchen.
A large white cloud shape on a pale blue wall, covered in black marker doodles of a plane, a bird, a bee and a sun, behind a small wooden children's table and chair with a potted succulent.
Posted By Main Street

How to Make a Stencil With Contact Paper for Crisp Painted Lines

A store-bought stencil gives you someone else's lettering in someone else's size. Learning how to make a stencil with contact paper gives you your own: the exact word for the pantry door, the leaf from the fabric you love, the house number in the font you picked. Self-adhesive paper is a natural fit for the job because it grips the surface while you paint, which is what keeps the edges sharp. Here is how to draw it, cut it, lay it down and lift it off cleanly. Why adhesive paper works as a stencil, and where it stops A loose stencil leaks. Paint creeps under any edge that is not held down, and the result is a fuzzy outline you cannot fix. A stencil cut from self-adhesive paper is stuck to the surface along every cut line, so the paint has far less room to travel. The trade-off is durability. Paper absorbs a little paint each time you use it, and the cut edges soften once they get wet. Plan on a paper stencil being a one-project tool: perfect for a single sign, a set of matching jar labels or a border repeated a few times in one session, less suited to a pattern you will stamp across fifty feet of wall. For long runs, a rigid plastic stencil is the better buy. Main Street does not publish stenciling instructions for its papers, so everything below is general craft practice applied to the brand's own surface and prep guidance. Test on a scrap before you commit to the real piece. What you need before you start Adhesive paper. Leftover sheets from a wall or drawer project are ideal. The Eucalyptus Classic Sheets and the rest of that line measure 11 x 16 in, which is plenty for a word or a small motif. A sharp blade. A craft knife or a utility knife with a fresh tip. Dull blades tear paper instead of slicing it. A cutting surface. A self-healing mat, or a stack of thick cardboard you do not mind scoring. Pencil, ruler and painter's tape. The tape holds your template still and rescues small pieces later. A smoothing tool or an old plastic card to press the edges down. A stencil brush, foam pouncer or dense sponge, plus the paint for your surface. How to make a stencil with contact paper, from sketch to cut 1. Put the design on the paper You have three ways to get the artwork onto the sheet. Draw freehand on the printed face, tape a printout over the sheet and cut through both layers, or trace onto the backing liner. Watch the direction if you use the liner. Anything drawn on the back comes out mirrored once you flip the sheet over, which is harmless for a leaf and a disaster for a word. Reverse lettering before you trace it, or draw on the front. If you expect to redraw a few times, a writable sheet saves frustration. The Dry Erase Classic craft paper takes dry erase markers, so you can sketch the outline, wipe away the wrong curve and try again before the knife ever touches it. The Chalkboard Classic does the same job with chalk or chalk markers. Both come as single 11 x 15 in sheets, a handy size for a sign. 2. Cut slowly and turn the paper, not the knife Keep the backing on while you cut. It gives the paper body and stops the adhesive from grabbing your mat. Pull the blade toward you in steady strokes and rotate the sheet as you go round a curve, so your wrist stays in the same comfortable position. For straight lines, run the blade along a ruler. A pattern with strong printed lines can do some of the measuring for you. The vertical bands on the Woven Stripe sheets, for example, give you ready-made guides for keeping a row of letters square. 3. Remove the pieces you want painted A stencil is a hole in the shape of your design. Lift out the cut shapes with the knife tip and keep the surrounding frame intact. 4. Rescue the islands Letters such as O, A, B, D, P and R have centers that are not connected to anything. Cut them out with the rest, set them aside on a piece of liner, and stick each one back in place once the frame is on the surface. Alternatively, leave a thin bridge of paper joining the center to the frame, the way classic stencil fonts do. Cutting a stencil on a digital cutting machine Many home cutting machines can cut adhesive paper, and a machine is the easiest way to get crisp small lettering. Main Street does not publish machine settings for its sheets, so run a small test shape first and adjust blade depth and pressure until the knife slices the paper without cutting the liner. Check the sheet against your mat before you load it. An 11-inch side fits across a 12-inch-wide mat, but a 16-inch Classic Sheet is longer than a 12 x 12 in mat, so either trim the sheet to length or use a longer mat if your machine accepts one. Laying the stencil down and painting without bleed Sharp lines start with the surface. Main Street's application guide asks for a clean, dry base: wipe away dust with a damp cloth, then use a mix of 30 percent isopropyl alcohol and 70 percent water and let it dry completely. On a freshly painted wall, the brand says to wait at least four weeks before applying its sheets. That advice matters even more for a stencil, because you are going to pull the paper back off, and soft paint underneath is more likely to lift with it. Press every edge. Peel the liner, position the stencil and run a smoothing tool firmly over all the cut lines, especially fine points and inside corners. Seal the edges. Brush a thin coat of your background color, or a clear matte medium, along the cut edges and let it dry. Any paint that creeps under now matches the surface, and it closes the gap for the real color. Use very little paint. Load the brush, then blot most of it onto a paper towel. Dab straight down instead of brushing across the edge, which pushes paint underneath. Build thin coats. Two or three light layers give cleaner lines than one heavy one. Lift once the paint has set. Advice varies, but most crafters agree you should not pull the stencil while the paint is still wet. Wait until it has dried to the touch, then peel slowly at a low angle, away from the painted shape. If the paint film starts to tear along an edge, score it with your blade before you keep pulling. For more on getting adhesive paper to lie flat, our guide on how to apply contact paper without bubbles covers the pressing technique in detail. Walls, wood, glass and fabric: where a paper stencil belongs A stencil only works if it sticks, so the surface rules for the sheets themselves apply. Main Street lists smooth tile, sealed wood and painted drywall as the best surfaces, and advises against textured or popcorn walls, brick and stone, and areas exposed to moisture. Our breakdown of what contact paper sticks to goes surface by surface if yours is not on that list. Painted walls: a good match once the paint has cured, for a word above a reading nook or a motif along a hallway. Sealed wood: signs, crates, drawer fronts and tabletops all work, provided the finish is smooth. Glass: etching cream is a corrosive chemical, and Main Street's papers are not designed or tested for it. Use the stencil material the cream maker recommends. Fabric: not on the brand's surface list, and a pressure adhesive tends to grip a weave loosely. Freezer paper, which is ironed onto the cloth, is the usual route for shirts and tote bags. Never iron Main Street's sheets, as the brand publishes no heat rating for them. Small stenciled pieces pair nicely with the other paper projects in our guide to craft wallpaper, such as labeled boxes and desk sets. Frequently asked questions Can you use contact paper as a stencil? Yes. Self-adhesive paper makes a good homemade stencil because it sticks along every cut edge, which keeps paint from creeping underneath. Draw or print your design, cut it out with a sharp blade, press the stencil onto a clean, smooth surface and dab paint on in thin coats. Expect a paper stencil to last one project rather than many. Will a contact paper stencil peel paint off the wall? It can if the wall paint is soft or poorly bonded. Main Street recommends waiting at least four weeks after painting before applying its sheets, and that patience matters doubly for a stencil you plan to remove. Test a small patch somewhere hidden, peel slowly at a low angle, and stop if the base paint starts to come up. Can you reuse a contact paper stencil? Sometimes, for a few repeats in the same session. Paper soaks up a little paint and its grip weakens every time it is lifted, so the edges slowly lose their sharpness. Keep it on its original liner between uses, and switch to a rigid plastic stencil for designs you will repeat dozens of times. How do you keep the middle of letters in a stencil? Cut the centers of letters like O, A and R out with the rest of the design, keep them on a scrap of liner, and stick them back in position after the frame is down. Another option is a thin paper bridge linking each center to the frame, the trick behind classic stencil fonts. How do you remove a stencil once the project is finished? Peel it back slowly at a low angle once the paint has set. If any adhesive is left behind on the surface, our step-by-step guide on how to remove contact paper covers gentle ways to lift residue without scrubbing through the finish underneath.
Black chalkboard wall behind a countertop espresso machine and a white coffee cup, with 'My Coffee Bar' and a Greek frappe recipe handwritten in white chalk beside doodles of cups, coffee beans and a star.
Posted By Main Street

Chalkboard Paint vs Chalkboard Wallpaper: Which Writable Wall Should You Choose?

A writable wall starts in one of two aisles. One holds a can of flat black paint, a roller and a free weekend. The other holds a stack of self-adhesive sheets you can press up before dinner and move if you change your mind. The chalkboard paint vs chalkboard wallpaper question comes down to three things: how much wall you want, how long you are willing to wait before the first grocery list goes up, and whether that wall is yours to paint at all. Chalkboard paint vs chalkboard wallpaper: the short answer Chalkboard paint wins when you want one large, seamless board on a wall you own, you can work around a curing period, and you do not mind that the wall stays black until you repaint it. Chalkboard wallpaper wins when you want to write today, when you rent, when the board needs to be small or movable, or when the thought of painting a wall black and then painting it back later is the thing stopping you. Both give you a surface that takes chalk and erases. The differences live in the setup, the waiting and the exit. If you want the basics on how the sheets themselves work and where they go, the chalkboard wallpaper 101 covers that ground. A quick definition of each, since the names overlap. Chalkboard paint is a wall paint with a hard, flat, slightly toothy finish that holds chalk dust. Chalkboard wallpaper is a self-adhesive sheet with the chalk-ready surface already on it. Main Street's version is Chalkboard Classic Peel and Stick Craft Paper: an 11 by 15 inch panel with a black writable surface and a peel-off backing, so there is no separate adhesive to brush on and nothing to cure. The product page lists it as writable and erasable with chalk and chalk markers, best applied to painted and finished surfaces, and removable and repositionable. The timeline: how long until you can write on it With paint Prep. Wash the wall and let it dry. The brush-on data sheet we read asks for a light sanding on glossy surfaces and recommends a primer for the best grip, and the spray-can instructions want the surface clean, dull and dry before the first pass. Coats. Two coats is the standard call for brush-on paint, with a recoat window of about four hours on the data sheet we checked. Spray formulas go on as two or three light coats a few minutes apart. Cure. The finish has to cure before anyone touches it with chalk. One spray brand asks for 24 hours before first use; the brush-on sheet asks for three days, and adds that you should wait a full week before wiping the board down with a damp cloth. Follow the number on your own can. Condition. Once cured, rub the side of a stick of chalk over the entire board and erase it. Every label we looked at includes this step, because the thin film of chalk dust is what makes later erasing clean. Add it up and a painted chalkboard wall is somewhere between two days and a week from first coat to first doodle, with the wall off limits for most of it. With sheets Prep. Wipe the wall with a damp cloth to lift dust. Main Street's own how-to guide suggests a mix of 30 percent isopropyl alcohol and 70 percent water for the best bond, then letting the surface dry completely. One real wait. If the wall was painted recently, Main Street asks you to hold off at least four weeks before applying any of its sheets. Fully cured paint gives the adhesive something stable to hold. Apply. Mark a level line, peel back a few inches of backing, press the top edge to the line and smooth downward with a smoothing tool to push air out. Trim the edges with a utility knife. Write. There is no cure and no conditioning step on the product page. When the last panel is pressed flat, the board is in service. How they write and erase A painted board and a sheet both take ordinary stick chalk, and both erase it with a dry cloth or a felt eraser. The paint side has one extra rule worth repeating: do the conditioning step before the first real message, and repeat it after any wet cleaning, which is what the data sheet asks for. Chalkboard Classic is listed as compatible with chalk markers as well as traditional chalk. Liquid chalk gives you brighter, more permanent-looking lines, which is lovely for a menu heading and less lovely for the daily to-do list, because it usually wants a damp cloth to erase and can leave a faint shadow behind on any chalkboard surface. If markers are really what you are after, the question may not be paint versus sheets at all. Main Street's Dry Erase Classic Peel and Stick Craft Paper is the white, marker-friendly sibling of the chalkboard sheet, and the dry erase wallpaper guide walks through where a write-on wall earns its keep. Size, shape and the wall you have Paint has no edges. It will fill an arch, run floor to ceiling, wrap a chimney breast or stop exactly at a line of painter's tape, and it does all of that without a single seam. It also copes with a lightly textured wall, though your handwriting will follow every bump. Sheets come in a fixed 11 by 15 inch panel, so a larger board is a grid, and a grid has seams. In exchange, sheets go places paint rarely does. A cabinet door, the inside of a pantry door, a desk pad, a bin label or a single panel beside the fridge are all one-sheet jobs that nobody would open a paint can for. Surface matters more for sheets than for paint. Main Street's guidance is to apply them to smooth tile, sealed wood or clean, flat, painted drywall, and to skip textured or popcorn walls, brick and stone, ceilings, and areas exposed to moisture such as bathrooms and showers. The ceiling line is about this craft paper's adhesive working against gravity, not a rule for every peel and stick product, but it is the brand's guidance and worth respecting. If your only candidate wall is textured, paint is the one that can cope. Renters, moving out and changing your mind Here the sheets pull ahead. A chalkboard-painted wall is a black wall, and reversing it is a painting project of its own: wipe off the chalk film, prime so the dark color does not bleed through, then as many coats of the original color as it takes to hide it. Many leases treat that as a change you are expected to undo, and some landlords will not allow it in the first place. Chalkboard Classic is described on its product page as removable and repositionable. Take a panel down slowly and low, keeping the angle shallow, and test an inconspicuous corner first, because how cleanly any adhesive sheet releases depends on the wall and its paint as much as on the sheet. The renter's guide to wall damage goes into what to expect on different paint finishes. Repositionable also means a board can move when life does: the command center beside the fridge can shift to the hallway, or shrink from six panels to two, without a paint tray in sight. One design note. A black rectangle on a white wall can look tacked on, whichever way you make it. A border of patterned sheets around the board, something like the Woven Stripe sheets, turns it into a framed panel that reads as a decision rather than an afterthought. Can you put chalkboard paint over wallpaper? People ask this in both directions. Painting chalkboard paint over existing wallpaper is possible and rarely a good idea. Paint is wet, and wet paper swells and lifts at the seams; printed or coated wallpapers also resist paint the same way any sealed surface does, which is the whole problem laid out in the guide on painting over contact paper. Strip it first, let the wall dry, then paint. The reverse, putting chalkboard sheets over existing wallpaper, is kinder to the wall but still a judgment call. The sheets need a smooth, well-adhered, non-textured base to hold, and the article on peel and stick over existing wallpaper explains how to test whether yours qualifies. When in doubt, one panel in a corner for a week will tell you more than any forum thread. Frequently asked questions Is chalkboard wallpaper better than chalkboard paint? Neither is better in every case. Chalkboard wallpaper sheets are faster, need no cure or conditioning, and are listed as removable and repositionable, which suits renters and small or movable boards. Chalkboard paint gives a seamless board of any size and shape and tolerates light texture, at the cost of a multi-day project and a black wall you will eventually have to repaint. Can you put chalkboard paint over wallpaper? You can, but most painters advise against it. Wet paint can swell and lift wallpaper at the seams, and coated or printed papers do not give paint much to grip. Stripping the wallpaper first, letting the wall dry and then painting is the more durable route. If stripping is off the table, self-adhesive chalkboard sheets over smooth, well-adhered paper are a gentler option to test. How long does chalkboard paint take before you can write on it? It depends on the formula. One spray brand's instructions allow first use after 24 hours, while the brush-on data sheet we checked asks for two coats about four hours apart and a three-day cure, followed by conditioning the board with the side of a piece of chalk. Always follow the cure time printed on your specific can, because brands differ. Can you use chalk markers on chalkboard wallpaper? Chalkboard Classic is listed as compatible with both chalk and chalk markers. Markers give bolder lines but usually need a damp cloth to erase and can leave a faint shadow on any chalkboard surface, so test them in a corner first. For anything you rewrite daily, ordinary stick chalk is the easier choice.
Three-drawer dresser with a black frame and drawer fronts covered in wood slat peel and stick wallpaper sheets, a vase of white flowers on top, against a dark green wall.
Posted By Main Street

How to Do Corners With Contact Paper: Inside, Outside and Rounded Corners

Flat surfaces are the easy part. Anyone can smooth a sheet across the middle of a shelf. The job is decided at the edges, where the paper has to turn, fold or stop, and where a lazy cut shows every time the drawer opens. If you want to know how to do corners with contact paper so they look factory-finished, the method is the same for a drawer, a desk or a cabinet door: work out which kind of corner you are facing, then cut for it instead of forcing the paper to bend. The three kinds of corner, and why paper treats them differently Paper folds cleanly in one direction at a time. Ask it to bend two ways at once and it bunches, creases or tents up. That one fact explains almost every tidy corner and every ugly one, so sort your project into these three before you peel anything. Inside corners are valleys: the line where a drawer bottom meets its back wall, or where two sides of a cabinet interior meet. The paper has to stop or turn into the fold. Outside corners are ridges: the front edge of a shelf, the rim of a desk, the side of a cabinet door or a storage box. The paper wraps over the edge onto the next face. Rounded corners and curves are the troublemakers: a radius on a tabletop, a bullnose edge, a cylinder. Paper has very little stretch, so curves get cut, not pulled. Main Street's 11 x 16 inch Eucalyptus Peel & Stick Wallpaper Sheets and the rest of the Classic Sheets line are paper with a self-adhesive backing, made for painted, sealed and finished surfaces according to the product pages. On anything else, the adhesive loses before you reach the corner. Tools, prep and a scrap test The brand's guide names four tools: a measuring tape and pencil, a utility knife, a damp cloth and a smoothing tool. For corners, add a metal ruler to guide the knife, sharp scissors for curves, and a fresh blade, because a dull blade drags paper instead of parting it and tears the point of the corner. Clean with the guide's mix of 30 percent isopropyl alcohol and 70 percent water, let the surface dry completely, and if the piece was painted recently, Main Street says to wait at least four weeks. Corners collect grease and dust, so run a cotton swab along the inside fold before you start. Then do the thing most people skip: cut a palm-sized scrap and practice the corner on the real edge, notch and all. A scrap costs a few square inches. A ruined sheet costs a twelfth of your pack. How to do corners with contact paper: inside corners Never bend a single sheet through an inside corner and expect it to stay. Paper springs back from a tight fold, and the adhesive at the crease lets go first. Use one of these two approaches instead. Run the first piece a quarter inch into the corner Apply the first surface, say the drawer bottom, and let it climb about a quarter inch up the back wall. Press it into the fold with a fingernail or the rounded end of your smoothing tool. Then cut the piece for the back wall so it starts right in the corner and covers that small flap. The overlap hides the fold, and the second piece holds the first piece's edge down. Or cut flush and leave a hairline If only the drawer bottom is getting covered, lay the sheet with half an inch of overhang against the back wall, crease it hard into the corner, then run the knife along the crease with the blade angled slightly into the wall. The hairline it leaves disappears in the shadow of the fold. Our guide to applying contact paper covers this crease-and-trim method in more detail. How to wrap outside corners and edges Outside corners are where you earn the compliment. The only real question is what to do where two folds collide. Cut with overhang. Leave three quarters of an inch to an inch of extra paper on every side you plan to wrap. Apply the flat face first. Peel back a few inches of backing, align the sheet, then pull the backing away slowly while you smooth from the center outward. Stop before the edge. Notch the corners before you fold. At each corner of the overhang, cut a small square out, the same depth as the overhang. Without it the two flaps stack into a lump you can feel through the print. On a thin edge like a cabinet door, a 45 degree cut from the corner works too, the same miter used to cover a book with contact paper. Fold one side, then the other. Smooth the first flap over the edge with firm strokes, then the adjoining flap, and crease each fold with the edge of the smoothing tool so it sits sharp. Trim the flaps. Run the knife along the underside or back edge where the flap ends, and press any seam closed with a fingertip. On a thick edge, say a shelf or desk more than three quarters of an inch deep, cut a separate strip for the edge first, then lay the top sheet so it folds down over the strip by about a quarter inch. The seam lands on the vertical face, where nobody looks, as in the desk guide. And go slowly: the product pages describe the sheets as something you can reposition while you go, so a crooked fold can be lifted at a shallow angle and laid again. Rounded corners and curved surfaces This is where contact paper and the thick, stretchy films used on car bodies part ways. Those films are warmed and stretched around a curve. Main Street's sheets are paper, and the brand publishes no heat guidance for them, so a curve gets one of two treatments instead. A rounded corner on a flat top Many desks and side tables have a radius at each corner of the top. Cover the top with a square overhang as usual, then hold the knife vertically against the curved edge and trim flush, letting the edge guide the blade. If you would rather cut first, trace a coin or jar lid that matches the radius on the back of the paper and cut the arc with scissors. A convex curve: a bullnose, a round rim, a cylinder Paper will not wrap smoothly around a rounded lip; it tents off the high point and tends to lift. Either trim flush where the curve begins and leave the curve bare, or cover it with short darts: cut relief slits into the overhang about an inch apart, then press each tab down so they overlap like roof tiles. A busy pattern hides the overlaps; a plain color shows them. Round tables get a template and one center seam, as in our lazy susan liner guide. One place to be cautious: kitchen counters. A bullnose counter edge is a curve by definition, and the product pages ask you to keep the sheets out of moisture and wet zones. Read what a papered counter can and cannot do before you commit a pack to one. Choosing a pattern that forgives the corner Technique is half of a clean corner. The print is the other half: some designs make a one-degree error invisible and others announce it. Scattered, directionless prints are the most forgiving. Floral Sprinkles and Eucalyptus can turn a corner at any point in the repeat, and the eye never looks for a match. Wood and stone textures hide seams in their grain. Distressed Wood Grey on a shelf edge reads as a real board edge, and Wood Slat Panel works best when the slats run the same way as the fold, so the seam lands between two slats. Strong geometrics are the unforgiving test. Indigo Diamonds looks superb when the diamond rows run parallel to the edge and a full motif sits at the fold, so plan each cut to land on a line in the pattern. Two layout habits help every print: put the factory-cut edge of the sheet at the most visible corner, since it is straighter than anything cut by hand, and push seams and notches to the back or underside. If a corner lifts anyway, it is almost always prep or pressure, so clean the edge and press the fold again. For bubbles and edges that keep curling, our repair guide takes each case in turn. Frequently asked questions How do you do corners with contact paper? Decide which corner you have. For an inside corner, run the first sheet a quarter inch into the fold and start the next sheet in the corner over that flap. For an outside corner, leave an inch of overhang, cut a square notch at the corner, then fold one side and the other. For rounded corners, trim flush or use short relief cuts. How do you wrap rounded corners with contact paper? Paper has very little stretch, so do not pull it around a radius. On a rounded tabletop corner, apply the top and trim flush with the knife held against the curved edge. On a rounded lip or rim, cut relief slits into the overhang about an inch apart and press each tab down so they overlap, or stop the paper where the curve begins. Do you overlap contact paper at inside corners? Yes, by a small amount. Let the first piece climb about a quarter inch onto the adjoining surface and press it into the fold, then start the second piece right in the corner so it covers that flap. The overlap hides the crease and holds the first edge down. Bending one piece through the corner rarely holds. How do you cut contact paper around corners without bunching? Bunching happens when two flaps of overhang stack at the same corner. Before you fold anything, cut a square out of the overhang at each corner, the same depth as the overhang. On thin edges like a cabinet door, a 45 degree cut from the corner does the same job. Use a fresh blade so the point of the cut is clean. Can you put contact paper on a curved surface? On a gentle, smooth curve, yes, with a template and relief cuts; a round tabletop works with a center seam. On a tight rounded rim, paper tents off the high point, so trim flush where the curve starts instead. Keep the surface painted, sealed or finished, as the product pages specify, and keep the sheets out of wet zones whatever the shape.