
Black chalkboard wall behind a countertop espresso machine and a white coffee cup, with 'My Coffee Bar' and a Greek frappe recipe handwritten in white chalk beside doodles of cups, coffee beans and a star.
MS Creations

Chalkboard Paint vs Chalkboard Wallpaper: Which Writable Wall Should You Choose?

Main Street8 MIN READ

A writable wall starts in one of two aisles. One holds a can of flat black paint, a roller and a free weekend. The other holds a stack of self-adhesive sheets you can press up before dinner and move if you change your mind. The chalkboard paint vs chalkboard wallpaper question comes down to three things: how much wall you want, how long you are willing to wait before the first grocery list goes up, and whether that wall is yours to paint at all.

Chalkboard paint vs chalkboard wallpaper: the short answer

Chalkboard paint wins when you want one large, seamless board on a wall you own, you can work around a curing period, and you do not mind that the wall stays black until you repaint it. Chalkboard wallpaper wins when you want to write today, when you rent, when the board needs to be small or movable, or when the thought of painting a wall black and then painting it back later is the thing stopping you.

Both give you a surface that takes chalk and erases. The differences live in the setup, the waiting and the exit. If you want the basics on how the sheets themselves work and where they go, the chalkboard wallpaper 101 covers that ground.

A quick definition of each, since the names overlap. Chalkboard paint is a wall paint with a hard, flat, slightly toothy finish that holds chalk dust. Chalkboard wallpaper is a self-adhesive sheet with the chalk-ready surface already on it. Main Street's version is Chalkboard Classic Peel and Stick Craft Paper: an 11 by 15 inch panel with a black writable surface and a peel-off backing, so there is no separate adhesive to brush on and nothing to cure. The product page lists it as writable and erasable with chalk and chalk markers, best applied to painted and finished surfaces, and removable and repositionable.

The timeline: how long until you can write on it

With paint

  • Prep. Wash the wall and let it dry. The brush-on data sheet we read asks for a light sanding on glossy surfaces and recommends a primer for the best grip, and the spray-can instructions want the surface clean, dull and dry before the first pass.
  • Coats. Two coats is the standard call for brush-on paint, with a recoat window of about four hours on the data sheet we checked. Spray formulas go on as two or three light coats a few minutes apart.
  • Cure. The finish has to cure before anyone touches it with chalk. One spray brand asks for 24 hours before first use; the brush-on sheet asks for three days, and adds that you should wait a full week before wiping the board down with a damp cloth. Follow the number on your own can.
  • Condition. Once cured, rub the side of a stick of chalk over the entire board and erase it. Every label we looked at includes this step, because the thin film of chalk dust is what makes later erasing clean.

Add it up and a painted chalkboard wall is somewhere between two days and a week from first coat to first doodle, with the wall off limits for most of it.

With sheets

  • Prep. Wipe the wall with a damp cloth to lift dust. Main Street's own how-to guide suggests a mix of 30 percent isopropyl alcohol and 70 percent water for the best bond, then letting the surface dry completely.
  • One real wait. If the wall was painted recently, Main Street asks you to hold off at least four weeks before applying any of its sheets. Fully cured paint gives the adhesive something stable to hold.
  • Apply. Mark a level line, peel back a few inches of backing, press the top edge to the line and smooth downward with a smoothing tool to push air out. Trim the edges with a utility knife.
  • Write. There is no cure and no conditioning step on the product page. When the last panel is pressed flat, the board is in service.

How they write and erase

A painted board and a sheet both take ordinary stick chalk, and both erase it with a dry cloth or a felt eraser. The paint side has one extra rule worth repeating: do the conditioning step before the first real message, and repeat it after any wet cleaning, which is what the data sheet asks for.

Chalkboard Classic is listed as compatible with chalk markers as well as traditional chalk. Liquid chalk gives you brighter, more permanent-looking lines, which is lovely for a menu heading and less lovely for the daily to-do list, because it usually wants a damp cloth to erase and can leave a faint shadow behind on any chalkboard surface.

If markers are really what you are after, the question may not be paint versus sheets at all. Main Street's Dry Erase Classic Peel and Stick Craft Paper is the white, marker-friendly sibling of the chalkboard sheet, and the dry erase wallpaper guide walks through where a write-on wall earns its keep.

Size, shape and the wall you have

Paint has no edges. It will fill an arch, run floor to ceiling, wrap a chimney breast or stop exactly at a line of painter's tape, and it does all of that without a single seam. It also copes with a lightly textured wall, though your handwriting will follow every bump.

Sheets come in a fixed 11 by 15 inch panel, so a larger board is a grid, and a grid has seams. In exchange, sheets go places paint rarely does. A cabinet door, the inside of a pantry door, a desk pad, a bin label or a single panel beside the fridge are all one-sheet jobs that nobody would open a paint can for.

Surface matters more for sheets than for paint. Main Street's guidance is to apply them to smooth tile, sealed wood or clean, flat, painted drywall, and to skip textured or popcorn walls, brick and stone, ceilings, and areas exposed to moisture such as bathrooms and showers. The ceiling line is about this craft paper's adhesive working against gravity, not a rule for every peel and stick product, but it is the brand's guidance and worth respecting. If your only candidate wall is textured, paint is the one that can cope.

Renters, moving out and changing your mind

Here the sheets pull ahead. A chalkboard-painted wall is a black wall, and reversing it is a painting project of its own: wipe off the chalk film, prime so the dark color does not bleed through, then as many coats of the original color as it takes to hide it. Many leases treat that as a change you are expected to undo, and some landlords will not allow it in the first place.

Chalkboard Classic is described on its product page as removable and repositionable. Take a panel down slowly and low, keeping the angle shallow, and test an inconspicuous corner first, because how cleanly any adhesive sheet releases depends on the wall and its paint as much as on the sheet. The renter's guide to wall damage goes into what to expect on different paint finishes. Repositionable also means a board can move when life does: the command center beside the fridge can shift to the hallway, or shrink from six panels to two, without a paint tray in sight.

One design note. A black rectangle on a white wall can look tacked on, whichever way you make it. A border of patterned sheets around the board, something like the Woven Stripe sheets, turns it into a framed panel that reads as a decision rather than an afterthought.

Can you put chalkboard paint over wallpaper?

People ask this in both directions. Painting chalkboard paint over existing wallpaper is possible and rarely a good idea. Paint is wet, and wet paper swells and lifts at the seams; printed or coated wallpapers also resist paint the same way any sealed surface does, which is the whole problem laid out in the guide on painting over contact paper. Strip it first, let the wall dry, then paint.

The reverse, putting chalkboard sheets over existing wallpaper, is kinder to the wall but still a judgment call. The sheets need a smooth, well-adhered, non-textured base to hold, and the article on peel and stick over existing wallpaper explains how to test whether yours qualifies. When in doubt, one panel in a corner for a week will tell you more than any forum thread.

Frequently asked questions

Is chalkboard wallpaper better than chalkboard paint?

Neither is better in every case. Chalkboard wallpaper sheets are faster, need no cure or conditioning, and are listed as removable and repositionable, which suits renters and small or movable boards. Chalkboard paint gives a seamless board of any size and shape and tolerates light texture, at the cost of a multi-day project and a black wall you will eventually have to repaint.

Can you put chalkboard paint over wallpaper?

You can, but most painters advise against it. Wet paint can swell and lift wallpaper at the seams, and coated or printed papers do not give paint much to grip. Stripping the wallpaper first, letting the wall dry and then painting is the more durable route. If stripping is off the table, self-adhesive chalkboard sheets over smooth, well-adhered paper are a gentler option to test.

How long does chalkboard paint take before you can write on it?

It depends on the formula. One spray brand's instructions allow first use after 24 hours, while the brush-on data sheet we checked asks for two coats about four hours apart and a three-day cure, followed by conditioning the board with the side of a piece of chalk. Always follow the cure time printed on your specific can, because brands differ.

Can you use chalk markers on chalkboard wallpaper?

Chalkboard Classic is listed as compatible with both chalk and chalk markers. Markers give bolder lines but usually need a damp cloth to erase and can leave a faint shadow on any chalkboard surface, so test them in a corner first. For anything you rewrite daily, ordinary stick chalk is the easier choice.

MAIN STREET

Featured in this article

Shop the wallpapers mentioned above.

Learn & Inspire

Black chalkboard wall behind a countertop espresso machine and a white coffee cup, with 'My Coffee Bar' and a Greek frappe recipe handwritten in white chalk beside doodles of cups, coffee beans and a star.
Posted By Main Street

Chalkboard Paint vs Chalkboard Wallpaper: Which Writable Wall Should You Choose?

A writable wall starts in one of two aisles. One holds a can of flat black paint, a roller and a free weekend. The other holds a stack of self-adhesive sheets you can press up before dinner and move if you change your mind. The chalkboard paint vs chalkboard wallpaper question comes down to three things: how much wall you want, how long you are willing to wait before the first grocery list goes up, and whether that wall is yours to paint at all. Chalkboard paint vs chalkboard wallpaper: the short answer Chalkboard paint wins when you want one large, seamless board on a wall you own, you can work around a curing period, and you do not mind that the wall stays black until you repaint it. Chalkboard wallpaper wins when you want to write today, when you rent, when the board needs to be small or movable, or when the thought of painting a wall black and then painting it back later is the thing stopping you. Both give you a surface that takes chalk and erases. The differences live in the setup, the waiting and the exit. If you want the basics on how the sheets themselves work and where they go, the chalkboard wallpaper 101 covers that ground. A quick definition of each, since the names overlap. Chalkboard paint is a wall paint with a hard, flat, slightly toothy finish that holds chalk dust. Chalkboard wallpaper is a self-adhesive sheet with the chalk-ready surface already on it. Main Street's version is Chalkboard Classic Peel and Stick Craft Paper: an 11 by 15 inch panel with a black writable surface and a peel-off backing, so there is no separate adhesive to brush on and nothing to cure. The product page lists it as writable and erasable with chalk and chalk markers, best applied to painted and finished surfaces, and removable and repositionable. The timeline: how long until you can write on it With paint Prep. Wash the wall and let it dry. The brush-on data sheet we read asks for a light sanding on glossy surfaces and recommends a primer for the best grip, and the spray-can instructions want the surface clean, dull and dry before the first pass. Coats. Two coats is the standard call for brush-on paint, with a recoat window of about four hours on the data sheet we checked. Spray formulas go on as two or three light coats a few minutes apart. Cure. The finish has to cure before anyone touches it with chalk. One spray brand asks for 24 hours before first use; the brush-on sheet asks for three days, and adds that you should wait a full week before wiping the board down with a damp cloth. Follow the number on your own can. Condition. Once cured, rub the side of a stick of chalk over the entire board and erase it. Every label we looked at includes this step, because the thin film of chalk dust is what makes later erasing clean. Add it up and a painted chalkboard wall is somewhere between two days and a week from first coat to first doodle, with the wall off limits for most of it. With sheets Prep. Wipe the wall with a damp cloth to lift dust. Main Street's own how-to guide suggests a mix of 30 percent isopropyl alcohol and 70 percent water for the best bond, then letting the surface dry completely. One real wait. If the wall was painted recently, Main Street asks you to hold off at least four weeks before applying any of its sheets. Fully cured paint gives the adhesive something stable to hold. Apply. Mark a level line, peel back a few inches of backing, press the top edge to the line and smooth downward with a smoothing tool to push air out. Trim the edges with a utility knife. Write. There is no cure and no conditioning step on the product page. When the last panel is pressed flat, the board is in service. How they write and erase A painted board and a sheet both take ordinary stick chalk, and both erase it with a dry cloth or a felt eraser. The paint side has one extra rule worth repeating: do the conditioning step before the first real message, and repeat it after any wet cleaning, which is what the data sheet asks for. Chalkboard Classic is listed as compatible with chalk markers as well as traditional chalk. Liquid chalk gives you brighter, more permanent-looking lines, which is lovely for a menu heading and less lovely for the daily to-do list, because it usually wants a damp cloth to erase and can leave a faint shadow behind on any chalkboard surface. If markers are really what you are after, the question may not be paint versus sheets at all. Main Street's Dry Erase Classic Peel and Stick Craft Paper is the white, marker-friendly sibling of the chalkboard sheet, and the dry erase wallpaper guide walks through where a write-on wall earns its keep. Size, shape and the wall you have Paint has no edges. It will fill an arch, run floor to ceiling, wrap a chimney breast or stop exactly at a line of painter's tape, and it does all of that without a single seam. It also copes with a lightly textured wall, though your handwriting will follow every bump. Sheets come in a fixed 11 by 15 inch panel, so a larger board is a grid, and a grid has seams. In exchange, sheets go places paint rarely does. A cabinet door, the inside of a pantry door, a desk pad, a bin label or a single panel beside the fridge are all one-sheet jobs that nobody would open a paint can for. Surface matters more for sheets than for paint. Main Street's guidance is to apply them to smooth tile, sealed wood or clean, flat, painted drywall, and to skip textured or popcorn walls, brick and stone, ceilings, and areas exposed to moisture such as bathrooms and showers. The ceiling line is about this craft paper's adhesive working against gravity, not a rule for every peel and stick product, but it is the brand's guidance and worth respecting. If your only candidate wall is textured, paint is the one that can cope. Renters, moving out and changing your mind Here the sheets pull ahead. A chalkboard-painted wall is a black wall, and reversing it is a painting project of its own: wipe off the chalk film, prime so the dark color does not bleed through, then as many coats of the original color as it takes to hide it. Many leases treat that as a change you are expected to undo, and some landlords will not allow it in the first place. Chalkboard Classic is described on its product page as removable and repositionable. Take a panel down slowly and low, keeping the angle shallow, and test an inconspicuous corner first, because how cleanly any adhesive sheet releases depends on the wall and its paint as much as on the sheet. The renter's guide to wall damage goes into what to expect on different paint finishes. Repositionable also means a board can move when life does: the command center beside the fridge can shift to the hallway, or shrink from six panels to two, without a paint tray in sight. One design note. A black rectangle on a white wall can look tacked on, whichever way you make it. A border of patterned sheets around the board, something like the Woven Stripe sheets, turns it into a framed panel that reads as a decision rather than an afterthought. Can you put chalkboard paint over wallpaper? People ask this in both directions. Painting chalkboard paint over existing wallpaper is possible and rarely a good idea. Paint is wet, and wet paper swells and lifts at the seams; printed or coated wallpapers also resist paint the same way any sealed surface does, which is the whole problem laid out in the guide on painting over contact paper. Strip it first, let the wall dry, then paint. The reverse, putting chalkboard sheets over existing wallpaper, is kinder to the wall but still a judgment call. The sheets need a smooth, well-adhered, non-textured base to hold, and the article on peel and stick over existing wallpaper explains how to test whether yours qualifies. When in doubt, one panel in a corner for a week will tell you more than any forum thread. Frequently asked questions Is chalkboard wallpaper better than chalkboard paint? Neither is better in every case. Chalkboard wallpaper sheets are faster, need no cure or conditioning, and are listed as removable and repositionable, which suits renters and small or movable boards. Chalkboard paint gives a seamless board of any size and shape and tolerates light texture, at the cost of a multi-day project and a black wall you will eventually have to repaint. Can you put chalkboard paint over wallpaper? You can, but most painters advise against it. Wet paint can swell and lift wallpaper at the seams, and coated or printed papers do not give paint much to grip. Stripping the wallpaper first, letting the wall dry and then painting is the more durable route. If stripping is off the table, self-adhesive chalkboard sheets over smooth, well-adhered paper are a gentler option to test. How long does chalkboard paint take before you can write on it? It depends on the formula. One spray brand's instructions allow first use after 24 hours, while the brush-on data sheet we checked asks for two coats about four hours apart and a three-day cure, followed by conditioning the board with the side of a piece of chalk. Always follow the cure time printed on your specific can, because brands differ. Can you use chalk markers on chalkboard wallpaper? Chalkboard Classic is listed as compatible with both chalk and chalk markers. Markers give bolder lines but usually need a damp cloth to erase and can leave a faint shadow on any chalkboard surface, so test them in a corner first. For anything you rewrite daily, ordinary stick chalk is the easier choice.
Three-drawer dresser with a black frame and drawer fronts covered in wood slat peel and stick wallpaper sheets, a vase of white flowers on top, against a dark green wall.
Posted By Main Street

How to Do Corners With Contact Paper: Inside, Outside and Rounded Corners

Flat surfaces are the easy part. Anyone can smooth a sheet across the middle of a shelf. The job is decided at the edges, where the paper has to turn, fold or stop, and where a lazy cut shows every time the drawer opens. If you want to know how to do corners with contact paper so they look factory-finished, the method is the same for a drawer, a desk or a cabinet door: work out which kind of corner you are facing, then cut for it instead of forcing the paper to bend. The three kinds of corner, and why paper treats them differently Paper folds cleanly in one direction at a time. Ask it to bend two ways at once and it bunches, creases or tents up. That one fact explains almost every tidy corner and every ugly one, so sort your project into these three before you peel anything. Inside corners are valleys: the line where a drawer bottom meets its back wall, or where two sides of a cabinet interior meet. The paper has to stop or turn into the fold. Outside corners are ridges: the front edge of a shelf, the rim of a desk, the side of a cabinet door or a storage box. The paper wraps over the edge onto the next face. Rounded corners and curves are the troublemakers: a radius on a tabletop, a bullnose edge, a cylinder. Paper has very little stretch, so curves get cut, not pulled. Main Street's 11 x 16 inch Eucalyptus Peel & Stick Wallpaper Sheets and the rest of the Classic Sheets line are paper with a self-adhesive backing, made for painted, sealed and finished surfaces according to the product pages. On anything else, the adhesive loses before you reach the corner. Tools, prep and a scrap test The brand's guide names four tools: a measuring tape and pencil, a utility knife, a damp cloth and a smoothing tool. For corners, add a metal ruler to guide the knife, sharp scissors for curves, and a fresh blade, because a dull blade drags paper instead of parting it and tears the point of the corner. Clean with the guide's mix of 30 percent isopropyl alcohol and 70 percent water, let the surface dry completely, and if the piece was painted recently, Main Street says to wait at least four weeks. Corners collect grease and dust, so run a cotton swab along the inside fold before you start. Then do the thing most people skip: cut a palm-sized scrap and practice the corner on the real edge, notch and all. A scrap costs a few square inches. A ruined sheet costs a twelfth of your pack. How to do corners with contact paper: inside corners Never bend a single sheet through an inside corner and expect it to stay. Paper springs back from a tight fold, and the adhesive at the crease lets go first. Use one of these two approaches instead. Run the first piece a quarter inch into the corner Apply the first surface, say the drawer bottom, and let it climb about a quarter inch up the back wall. Press it into the fold with a fingernail or the rounded end of your smoothing tool. Then cut the piece for the back wall so it starts right in the corner and covers that small flap. The overlap hides the fold, and the second piece holds the first piece's edge down. Or cut flush and leave a hairline If only the drawer bottom is getting covered, lay the sheet with half an inch of overhang against the back wall, crease it hard into the corner, then run the knife along the crease with the blade angled slightly into the wall. The hairline it leaves disappears in the shadow of the fold. Our guide to applying contact paper covers this crease-and-trim method in more detail. How to wrap outside corners and edges Outside corners are where you earn the compliment. The only real question is what to do where two folds collide. Cut with overhang. Leave three quarters of an inch to an inch of extra paper on every side you plan to wrap. Apply the flat face first. Peel back a few inches of backing, align the sheet, then pull the backing away slowly while you smooth from the center outward. Stop before the edge. Notch the corners before you fold. At each corner of the overhang, cut a small square out, the same depth as the overhang. Without it the two flaps stack into a lump you can feel through the print. On a thin edge like a cabinet door, a 45 degree cut from the corner works too, the same miter used to cover a book with contact paper. Fold one side, then the other. Smooth the first flap over the edge with firm strokes, then the adjoining flap, and crease each fold with the edge of the smoothing tool so it sits sharp. Trim the flaps. Run the knife along the underside or back edge where the flap ends, and press any seam closed with a fingertip. On a thick edge, say a shelf or desk more than three quarters of an inch deep, cut a separate strip for the edge first, then lay the top sheet so it folds down over the strip by about a quarter inch. The seam lands on the vertical face, where nobody looks, as in the desk guide. And go slowly: the product pages describe the sheets as something you can reposition while you go, so a crooked fold can be lifted at a shallow angle and laid again. Rounded corners and curved surfaces This is where contact paper and the thick, stretchy films used on car bodies part ways. Those films are warmed and stretched around a curve. Main Street's sheets are paper, and the brand publishes no heat guidance for them, so a curve gets one of two treatments instead. A rounded corner on a flat top Many desks and side tables have a radius at each corner of the top. Cover the top with a square overhang as usual, then hold the knife vertically against the curved edge and trim flush, letting the edge guide the blade. If you would rather cut first, trace a coin or jar lid that matches the radius on the back of the paper and cut the arc with scissors. A convex curve: a bullnose, a round rim, a cylinder Paper will not wrap smoothly around a rounded lip; it tents off the high point and tends to lift. Either trim flush where the curve begins and leave the curve bare, or cover it with short darts: cut relief slits into the overhang about an inch apart, then press each tab down so they overlap like roof tiles. A busy pattern hides the overlaps; a plain color shows them. Round tables get a template and one center seam, as in our lazy susan liner guide. One place to be cautious: kitchen counters. A bullnose counter edge is a curve by definition, and the product pages ask you to keep the sheets out of moisture and wet zones. Read what a papered counter can and cannot do before you commit a pack to one. Choosing a pattern that forgives the corner Technique is half of a clean corner. The print is the other half: some designs make a one-degree error invisible and others announce it. Scattered, directionless prints are the most forgiving. Floral Sprinkles and Eucalyptus can turn a corner at any point in the repeat, and the eye never looks for a match. Wood and stone textures hide seams in their grain. Distressed Wood Grey on a shelf edge reads as a real board edge, and Wood Slat Panel works best when the slats run the same way as the fold, so the seam lands between two slats. Strong geometrics are the unforgiving test. Indigo Diamonds looks superb when the diamond rows run parallel to the edge and a full motif sits at the fold, so plan each cut to land on a line in the pattern. Two layout habits help every print: put the factory-cut edge of the sheet at the most visible corner, since it is straighter than anything cut by hand, and push seams and notches to the back or underside. If a corner lifts anyway, it is almost always prep or pressure, so clean the edge and press the fold again. For bubbles and edges that keep curling, our repair guide takes each case in turn. Frequently asked questions How do you do corners with contact paper? Decide which corner you have. For an inside corner, run the first sheet a quarter inch into the fold and start the next sheet in the corner over that flap. For an outside corner, leave an inch of overhang, cut a square notch at the corner, then fold one side and the other. For rounded corners, trim flush or use short relief cuts. How do you wrap rounded corners with contact paper? Paper has very little stretch, so do not pull it around a radius. On a rounded tabletop corner, apply the top and trim flush with the knife held against the curved edge. On a rounded lip or rim, cut relief slits into the overhang about an inch apart and press each tab down so they overlap, or stop the paper where the curve begins. Do you overlap contact paper at inside corners? Yes, by a small amount. Let the first piece climb about a quarter inch onto the adjoining surface and press it into the fold, then start the second piece right in the corner so it covers that flap. The overlap hides the crease and holds the first edge down. Bending one piece through the corner rarely holds. How do you cut contact paper around corners without bunching? Bunching happens when two flaps of overhang stack at the same corner. Before you fold anything, cut a square out of the overhang at each corner, the same depth as the overhang. On thin edges like a cabinet door, a 45 degree cut from the corner does the same job. Use a fresh blade so the point of the cut is clean. Can you put contact paper on a curved surface? On a gentle, smooth curve, yes, with a template and relief cuts; a round tabletop works with a center seam. On a tight rounded rim, paper tents off the high point, so trim flush where the curve starts instead. Keep the surface painted, sealed or finished, as the product pages specify, and keep the sheets out of wet zones whatever the shape.
White writing desk and chair against a wall of yellow and grey botanical peel and stick wallpaper, with the same pattern lining the open cubbies under the desktop.
Posted By Main Street

How to Cover a Desk With Contact Paper (and a Table Too)

Flat-pack desks come in the same three finishes, and the first scratch usually arrives before the first paycheck. Learning how to cover a desk with contact paper fixes the look in an afternoon, with no sanding, no primer and no waiting for anything to dry. The surface you work on every day also gets harder use than any wall, so the trick is knowing what adhesive paper can take on a desktop, what it cannot, and how to lay it so the edges outlast the semester. Which desks take contact paper well Adhesive paper wants a closed, smooth surface to grip. That makes the cheapest desks the easiest ones to cover: laminate and melamine tops are factory sealed, flat and non-porous, and paper bonds to them readily. A painted desk works too, as long as the paint is sound and fully cured. Main Street asks for a wait of at least four weeks after painting before anything self-adhesive goes on, and a desktop deserves the same patience as a wall. Sealed or varnished wood is fine. The product pages for the 11 x 16 inch Classic Sheets put it plainly: painted, sealed and finished surfaces. The disappointments are predictable. A raw pine top, an unfinished MDF edge or a desk sanded back to bare board will drink the adhesive unevenly and let corners lift. For the finish-by-finish breakdown, including plywood and particle board, see what contact paper sticks to. What a papered desktop can and cannot handle Think of the covering as a decorative skin, not a work surface in its own right. A few realities to plan around before you peel anything: Liquids. The Classic Sheets and the Craft Paper line are paper with an adhesive back, and Main Street does not describe them as water-resistant. A sweating glass or a spilled coffee needs wiping up quickly, and a coaster is the cheapest insurance you will ever buy. Heat. Main Street publishes no heat rating for the sheets. A laptop that runs warm sits on small feet, but if yours gets hot enough to notice, a stand or a desk mat under it is the sensible move. Pen pressure. Writing on a single loose sheet of paper directly over the covering can press a faint line into it. A notepad, a planner or a thin desk pad takes the pressure instead. The mouse. An optical mouse generally tracks on a matte printed surface. If it skips on a very light or very glossy design, a mouse pad solves it in a second. Wear. Forearms, sleeve buttons and a wheeled chair rub the front edge thousands of times a year. That edge is where any covering ages first, which is why the layout below starts there. If the desk doubles as a craft table or a potting bench, read contact paper on countertops first. The same wet-and-hot cautions apply. How to cover a desk with contact paper, step by step You need a measuring tape and pencil, a utility knife with a fresh blade, a damp cloth and a smoothing tool. That is the full list on Main Street's how-to page, and nothing about a desk changes it. 1. Clear and clean Take off everything, including a keyboard tray or a monitor arm clamp if they unscrew. Wipe the top with a damp cloth to lift dust, then go over it with a mix of 30 percent isopropyl alcohol and 70 percent water, the prep solution Main Street recommends, and let it dry completely. Hand cream and the ghost of old sticky notes are the usual reasons a sheet refuses to bond. 2. Measure and plan the sheets Measure the top edge to edge and decide which way the sheets will run. A Classic Sheet is 11 x 16 inches (1.22 square feet), so for most desks the 16 inch edge runs across the width and the 11 inch edge runs front to back. On a common 48 x 24 inch top that is three sheets across and three rows deep, nine in all, with trim to spare from a 12-pack. A 60 x 30 inch top takes four across and three deep, which uses all twelve sheets with nothing left for a mistake, so buy two packs. Main Street suggests ordering every sheet for a project at once so the color matches. 3. Start at the front edge Lay the first row along the front edge, the one your eye meets when you sit down, and work toward the wall. Peel back only a few inches of the backing, line the sheet up with your pencil mark, press the leading edge down and draw the backing out while the smoothing tool pushes from the center outward. Butt each new sheet against the last. Our guide to applying contact paper without bubbles covers seams and repositioning in detail. 4. Deal with the edges You have two choices at the front and sides. Trim flush with the knife held against the top edge, which looks crisp and is the right call on a rounded or beveled edge, since paper has almost no stretch and will not wrap a curve. Or leave about an inch of overhang on a square-edged top, cut a small square out of each corner so the two flaps do not stack, fold the flaps down over the edge and press them hard. Trim along the underside. 5. Press, then wait Go over every seam and edge once more with the smoothing tool, paying most attention to the front corners. Put the hardware back, but give the top a quiet evening before the monitor, the printer and the elbows return. Main Street publishes no cure time; the wait is simply a precaution. Choosing a pattern that hides the seams A desk is viewed from above at arm's length, which is less forgiving than a wall seen across a room. A busy, non-directional design such as Eucalyptus lets nine sheets read as one surface. A directional print such as Herringbone looks sharper but asks you to align every sheet to the one before it. A plank design like Distressed Wood Grey is the easy middle ground: run the boards left to right and let each seam fall on a printed joint. One upgrade worth stealing from the office supply aisle: a strip of Dry Erase Classic along the back edge of the top gives you an erasable to-do list you cannot lose under the keyboard. It is an 11 x 15 inch self-adhesive sheet, writable with dry erase markers, and it goes on the same way as the patterned sheets. Covering a table with contact paper: what changes A table follows the same steps, but the job changes with what the table is for. A console, a bedside table or a coffee table lives a dry, decorative life and is a near-perfect candidate. A dining table is a different proposition. Plates, condensation and daily wiping put a paper covering in exactly the conditions Main Street tells you to avoid, so treat a dining table as a short-term refresh at most, and keep placemats under everything. For a side table that gets wiped down now and then, the Luxury Cardstock line is the better pick. Natural Reflection is described on its product page as embossed peel and stick paper that is water-resistant, in 17.25 x 10 inch panels. Water-resistant is not the same as waterproof, and none of these papers is sold for standing water, but it is the line to reach for when the surface will meet a damp cloth more than once a week. Sizes differ across the cardstock designs, so check the product page. Round tables are their own puzzle of templates and center seams, solved in the lazy susan and round shelf guide. For dressers, cabinet fronts and bookcase backs, the furniture wallpapering guide has you covered. Taking it off a desk later On a sound factory finish, the paper usually lifts with slow, low-angle pulling and leaves little behind, which is why a papered desk is such a popular fix for dorm rooms, rented offices and a classroom desk that belongs to the school. An intact laminate top is the best case, while thin veneer and chalky old paint are the ones to test on an underside corner first. Main Street does not promise a clean removal from every finish, so read is contact paper removable before you cover a desk you have to hand back. Frequently asked questions Can you put contact paper on a desk? Yes, provided the top is smooth and finished. Laminate, melamine, sealed wood and fully cured paint all take self-adhesive paper well. Raw wood, bare MDF and textured finishes do not. Clean the surface with a damp cloth and a mild alcohol and water mix, let it dry, then apply the sheets from the front edge back. How many sheets does it take to cover a desk? Multiply the width and depth of the top in inches, divide by 176 (one 11 x 16 inch sheet), then round up and add one or two for trimming. A 48 x 24 inch desk takes nine sheets laid three across and three deep, so one 12-pack covers it. A 60 x 30 inch top needs twelve, so buy two packs for a margin. How do you cover a table with contact paper without bubbles? Peel only a few inches of backing at a time, press the leading edge down first, and pull the backing away while a smoothing tool pushes air from the center toward the edges. Small bubbles can be pricked with a pin and pressed flat. Clean, dry prep matters more than technique, since dust under the sheet is the usual cause. Can I use contact paper on a dorm desk I have to return? Dorm and office desks are usually laminate, which is the easiest surface for both sticking and removal. Test a corner on the underside first, pull slowly at a low angle when you leave, and wipe any residue with warm soapy water. Nobody can promise a perfect result on every finish, so inspect the desk before you commit. Does contact paper stick to a wood desk? It sticks to the finish, not to the wood. A varnished, lacquered or painted wood desk holds paper well. An oiled, waxed or unfinished top will not, and a sanded surface absorbs the adhesive and lets corners lift. If you are unsure, press a scrap on an underside corner and check it after a day.
Photo booth props cut from black embossed craft paper, a pair of glasses on a wooden stick and a curled mustache, below a string of white and gold marbled paper triangles
Posted By Main Street

What Is Craft Wallpaper? Craft Paper Explained, Plus 6 Projects for Leftover Sheets

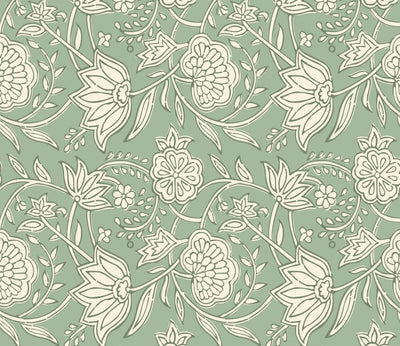
Most craft drawers hide a half-used pack of patterned sheets with no plan attached. That pack is, more or less, craft wallpaper: self-adhesive decorative paper cut to a size you can handle on a kitchen table instead of a ladder. Below you will find what the term means, how the different kinds compare, why a search for arts and crafts wallpaper returns two very different answers, and six small projects for whatever is left in the pack. What is craft wallpaper? Craft wallpaper is peel and stick decorative paper sold in sheets small enough to work with by hand, meant for covering objects and small surfaces as much as walls. A roll asks you to plan a room. A crafting wallpaper sheet asks you to plan a notebook, a box lid or one drawer front. The adhesive is already on the back, so there is no paste, no brush and no drying time. You measure, cut, peel and press. At Main Street the term covers two groups of products. The first is the everyday wallpaper sheets, which the product pages list as peel and stick paper wallpaper at 11 x 16 inches: about 1.22 square feet per sheet, or roughly 14.6 square feet in a 12-pack. That is plenty for a furniture face or a handful of small pieces. The second is a narrower line sold as Peel and Stick Craft Paper, where each sheet is built to do a particular job. Inside the craft paper line Sheets you can write on Chalkboard Classic and Dry Erase Classic are sold as single 11 x 15 inch sheets. The first takes chalk and chalk markers, the second takes dry erase markers, and both product pages recommend sticking them to painted and finished surfaces. One thing Dry Erase Classic is not: a magnet board. It has no metal layer for a magnet to grab, so treat it purely as a writing surface. If you are thinking about a larger chalk wall, our guide to chalkboard wallpaper covers the bigger picture. Sheets with texture and shine The Luxury Cardstock group adds raised, embossed texture and a metallic finish. Read each label, because they are not all the same material. Very Crock N Roll and Glow Getter are listed as embossed peel and stick foil, while Natural Reflection is listed as embossed peel and stick paper. The product pages for this group describe the sheets as water-resistant, which makes them the better pick for a desk tray or anything that gets wiped down now and then. Sizes vary by design (Very Crock N Roll and Glow Getter are 10 x 15 inches, other designs differ), so check the dimensions on the exact page before you plan a layout. Craft paper, wallpaper sheets or contact paper? People use these names almost interchangeably, and the overlap is real: all three are decorative sheets with adhesive already on the back. Where they part ways is in the details. Contact paper is usually sold on a long roll, and a good deal of what is marketed as shelf liner is plastic film rather than paper. Our explainer on what contact paper is goes into the differences. Wallpaper sheets are paper printed with repeating patterns, designed to line up edge to edge on a wall but sized so a single pack also stretches to small projects. Craft paper, in Main Street's sense, is a sheet with a function: something to write on, or a texture and finish that plain print cannot give you. A simple rule: if the project is mostly about pattern, reach for wallpaper sheets. If it needs to be written on, or to catch the light, look at the craft paper line. Arts and crafts wallpaper: one search, two meanings Type arts and crafts wallpaper into a search bar and the results split down the middle. Half of them mean wallpaper for crafting, as above. The other half mean a design movement. The Arts and Crafts movement took shape in Britain in the second half of the 1800s as a push back against cheap, machine-made goods. Its best-known wallpaper designer, William Morris, had his patterns printed by hand from carved wooden blocks, and they still define the look: winding vines, stylized flowers and leaves, set in earthy greens, ochres and deep blues. You do not need an antique roll to borrow that feeling. A stylized botanical in a muted palette does most of the work. Our Block Print Floral sheets, cream flowers and trailing stems on a soft sage ground, sit comfortably in that tradition. Busy patterns like this read best in small doses, so try one behind the glass of a display cabinet or across a single drawer front before you cover anything larger. What to do with leftover wallpaper: six small projects A wallpaper project almost never ends on the last sheet. If you have already worked through the drawers, trays and frames in our Dollar Tree wallpaper ideas roundup, these six send the scraps somewhere new. 1. Bookmarks with some backbone Stick a strip of patterned sheet to a strip of plain cardstock, back to back, then trim the two together with a craft knife and a metal ruler. A 2 x 6 inch strip is a comfortable size, and one 11 x 16 sheet yields about ten of them. Punch a hole at the top and add a length of ribbon if you like a tail. 2. Photo booth props and bunting Embossed sheets make convincing party props because the texture shows up on camera. Mount a sheet on card for stiffness, sketch glasses, a mustache or a bow tie on the backing, cut it out and tape it to a wooden skewer. For bunting, cut matching triangles, punch two holes along the top edge of each and thread them onto string. 3. A desk set that matches Wrap a cardboard magazine file, a pencil cup and a pen tray in the same pattern and a cluttered desk suddenly looks planned. Smooth, coated surfaces give the adhesive the best grip. Raw cardboard is more absorbent, so test a corner first and press each piece down firmly. 4. A running list inside a door A narrow strip of Dry Erase Classic inside a pantry or closet door turns into a shopping list or chore chart that never goes missing. Stick it to the smooth, painted face of the door, at eye height, well away from anything damp. 5. Lining a keepsake box The inside of a lid is a surface almost nobody thinks to decorate, which is exactly why it is fun to open. Measure the base and the lid separately, cut each panel with the backing still on, and press from the center outward. A metallic sheet makes a jewelry box feel more expensive than it was. 6. A test patch before the big wall Planning an accent wall for later? Put one leftover sheet somewhere discreet on that wall and live with it for a week or two. You will see how the color reads in the evening light and whether your paint and the adhesive get along. Main Street's how-to page asks you to wait at least four weeks after painting, and it steers you away from textured walls, brick, ceilings and damp rooms, so pick a test spot that meets those terms too. Cutting and sticking small pieces cleanly Small projects forgive less than walls do, because every edge sits close to the eye. A few habits make the difference: Cut with the backing on. The liner keeps the adhesive clean and gives the blade something firm to work against. A sharp craft or utility knife, a metal ruler and a cutting mat beat scissors for straight lines. Clean first. Main Street's prep step is a wipe with a damp cloth. For a deeper clean, the how-to page suggests 30% isopropyl alcohol to 70% water, then letting the surface dry completely. Soften the corners. On anything that gets handled, such as bookmarks or box lids, a slightly rounded corner is less likely to catch and lift than a sharp one. Press from the middle out. A smoothing tool, or the edge of an old plastic card, chases air toward the edges instead of trapping it. Keep paper projects dry. The paper wallpaper sheets are not sold as water-resistant, so keep them away from sinks, steam and anything headed for a dishwasher. Bigger ambitions? Our furniture guide walks through dressers, tables and cabinet fronts. Frequently asked questions What is craft wallpaper? Craft wallpaper is self-adhesive decorative paper sold in hand-sized sheets for small projects: covering boxes, notebooks, drawer fronts and shelf backs, as well as small areas of wall. The adhesive is pre-applied, so you cut it to size, peel off the backing and press it down. No paste, glue or drying time is involved. Can you use wallpaper for crafts? Yes. Peel and stick wallpaper sheets are well suited to crafts because they are already sized for small work and need no glue. Cut them with a sharp knife while the backing is still attached, stick them to clean, smooth surfaces, and keep paper projects away from water. Test absorbent materials like raw cardboard on a corner first. What can I do with leftover wallpaper? Leftover sheets are ideal for bookmarks, party props and bunting, a matching desk set, the lining of a keepsake box, or labels and lists. You can also stick one sheet on a wall you are thinking of covering and live with it for a while, which shows you the color in your own light before you commit to a bigger project. Is craft paper the same as contact paper? Not quite. Both have adhesive on the back, but contact paper is usually sold on a roll and is often a plastic film, while craft paper sheets are designed around a purpose, such as a chalkboard or dry erase surface, or an embossed metallic finish. Check each product page for the material, because it varies between lines. What is Arts and Crafts style wallpaper? It is wallpaper in the style of the Arts and Crafts movement, which began in Britain in the late 1800s. Designers such as William Morris favored hand block printing and nature-based patterns: twisting vines, stylized flowers and leaves, in earthy greens, golds and blues. Modern botanical prints in muted colors are an easy way to borrow the look.
Dining room with a white table, gray upholstered chairs and a brass globe chandelier in front of a large white-framed window, the surrounding wall covered in dark Queen Anne's Lace peel and stick wallpaper with cream wildflowers
Posted By Main Streetwallpaper sheets

Wallpaper for a Dining Room: 4 Ideas With Peel and Stick Sheets

Most rooms get a glance. The dining room gets an audience. People sit in it for an hour at a time, facing the same wall, with nothing to do between courses but look around. That makes wallpaper for a dining room one of the best-value decorating moves in the house: a pattern that would be background noise in a hallway becomes the thing your guests remember. This guide covers the wall, the pattern and the layout, all with peel and stick sheets rather than a weekend of paste. What makes the dining room an easy room to wallpaper A dining room asks very little of a wall. There is no shower steam, no toothbrush splash and, in most homes, no stove on the other side of the plaster. It is used in bursts, then left alone. For a self-adhesive paper, those are close to ideal conditions. Main Street's wallpaper sheets are made for exactly this kind of surface. Each product page lists the application surface as painted, sealed and finished surfaces, and the brand's installation guide names smooth painted drywall among the best places to use them. Most dining room walls are just that. The format helps too. Each sheet is 11 x 16 inches, about 1.22 square feet, and a 12-pack covers roughly 14.6 square feet, so you can buy for one wall or one section of it. The product pages also describe the sheets as removable and repositionable, which suits renters who want a dinner-party backdrop without a conversation with the landlord. Choose the wall your guests actually face In a living room, the feature wall is usually behind the sofa. A dining room works the other way around: think about what sits in front of each chair, then pick from these four spots. The wall opposite the host. Whoever sits at the head of the table spends the evening looking down its length. Paper the far wall and the whole table gets a focal point. The window wall. A window breaks a wall into small sections that sheets fill neatly. Pattern around a bright white window frame makes the view look deliberate, the way a mat sets off a painting. Behind the sideboard or buffet. A papered rectangle above a sideboard stands in for a large piece of art, and it never needs framing. The boundary of an open-plan dining zone. When the dining table shares a room with the kitchen or living area, one papered wall tells the eye where dinner begins. Watch the chair line and the serving zone Dining rooms have one hazard other rooms do not: chairs. Every time someone pushes back from the table, a chair back can knock the wall behind it, and paper there is a surface finish, not armor. The simplest fix is to start the pattern above the height of your chair backs. A chair rail, even a slim painted strip of trim, gives you a crisp edge to trim against and protects the band below. The second zone to think about is wherever food gets served. A buffet that holds warming trays or a pass-through from the kitchen will see steam, drips and the occasional splash of gravy. The sheets are paper, the brand does not publish a heat rating for them, and Main Street lists areas exposed to moisture among the surfaces to avoid. Keep the pattern a sensible distance above anything hot or wet, and keep candles well clear of the wall. Wallpaper for a dining room: four ideas using sheets 1. A dark floral around the window Deep grounds do something special in a dining room, which is mostly used after dark. Queen Anne's Lace scatters fine cream and gold wildflower heads across a near-black background. Under a warm pendant light, the pale flowers glow and the dark ground falls away, which makes a small room feel intimate rather than cramped. Wrapping it around a white window frame, as in the photo above, gives you strong contrast with almost no effort. 2. A framed panel above the sideboard If papering a whole wall feels like too much, treat the pattern like a painting. Set 12 sheets upright in two rows of six and you get a panel 66 inches wide and 32 inches tall, a good match for a standard sideboard. That uses one full 12-pack with nothing to spare, so buy a second pack for pattern matching and the occasional miscut. Edge it with thin painted molding for a built-in look. A botanical such as Magnolia Branches, white blossoms on a deep teal, suits this treatment because the pattern has room to breathe inside the frame. 3. The back of a china cabinet or hutch A glass-front cabinet full of white plates is a wonderful thing to line. The back panel is usually sealed or painted wood, which sits on the brand's list of suitable surfaces, and the area is small enough to finish in an evening. Toile Forest, a green tree canopy against a pale sky, turns a stack of everyday dishes into a proper display. For trimming around shelf supports and hinges, our guide to wallpapering furniture walks through the cuts. 4. A warm wall to anchor an open-plan table In a shared kitchen and dining space, you want the dining corner to feel like its own room without building one. Wood Slat Panel prints the look of warm brown vertical wood slats, and on the wall beside the table it suggests paneling and warmth without a single board. It is a printed, smooth finish, so it reads as wood from across the room rather than up close. Dark or light? Decide by when you eat The usual advice about pattern scale and color applies to every room, and our living room ideas cover it in detail. The dining room adds one question the other rooms do not: what time of day is this room at its best? Mostly dinners. Lean dark and rich. A deep ground looks its best under lamplight and candlelight, and the room will rarely be judged in harsh midday sun. Mostly breakfast and homework. Go lighter. A quiet pattern like Neutral Palm, soft beige fronds on cream, keeps a morning table bright and plays nicely with whatever else is happening in an open-plan space. Both. Choose a mid-tone pattern and let a dimmer on the pendant change the mood. Distance matters too. Guests see the wall from a seat a few feet away, where a very fine pattern can blur into one color while a medium motif stays readable. Tape one sheet up, sit in the chair facing it and judge from there before ordering the rest. Measuring and hanging sheets in a dining room For a full wall, multiply width by height in feet for the square footage, divide by the 14.6 square feet a 12-pack covers and round up. Keep a margin for trimming around frames and outlets. Our measuring guide works through a full example. Hanging follows Main Street's four steps. You need a measuring tape, a pencil, a utility knife, a damp cloth and a smoothing tool. Prep. Wipe the wall with a damp cloth, then with a mix of 30% isopropyl alcohol and 70% water, and let it dry completely. If the room was recently painted, the brand says to wait at least four weeks first. Measure and align. Draw a light pencil guide with a level. In a dining room with a chair rail, the rail is tempting as a guide, but old trim is rarely true, so check it. Peel and stick. Peel back the first few inches of backing, align the top edge to your guideline and press it firmly into place. Smooth and trim. Pull the backing down slowly while the smoothing tool pushes air out toward the edges, then trim at window casings, the chair rail and the baseboard with a sharp utility knife. For corners and outlets, see our step-by-step guide on how to apply peel and stick wallpaper. Frequently asked questions Is peel and stick wallpaper good for a dining room? Yes, it is one of the better rooms for it. Dining room walls are usually smooth, painted and dry, which matches the painted, sealed and finished surfaces Main Street recommends for its sheets. Keep the pattern above chair-back height or behind a chair rail, and away from warming trays, candles and any spot that sees steam or spills. Which wall should you wallpaper in a dining room? Start with the wall most diners face, usually the one opposite the head of the table or the wall behind a sideboard. A window wall also works well because the frame breaks the pattern into neat sections. In an open-plan space, paper the wall that marks the edge of the dining zone so the table feels like its own room. Should dining room wallpaper be dark or light? It depends on when you use the room. If it mostly hosts evening meals, a dark pattern looks rich under warm lighting and makes the space feel intimate. If the table is used for breakfast, homework and daytime work, a lighter, quieter pattern keeps it bright. Test one sheet on the wall and judge it from a seat, not from the doorway. Can you put contact paper on a dining table? People do, but a tabletop is a working surface that sees hot dishes, spills and constant wiping. Main Street's paper sheets are not sold as a tabletop covering, and the brand does not publish a heat or water rating for them. We would keep them off the top itself and use them where they last, such as on a sideboard, a hutch back or the wall behind the table. How many packs do I need for a dining room accent wall? Multiply the wall's width by its height in feet, then divide by 14.6, the approximate coverage of a 12-pack of Main Street's 11 x 16 inch wallpaper sheets, and round up. A 10 x 8 foot wall is 80 square feet, which works out to about five and a half packs, so buy six, plus one more if you are trimming around windows. Each product page lists its exact coverage.
Pastel pink, peach and lilac cloud wallpaper with tiny stars behind a wooden easel, a pink cushioned stool, a pink hamper and a small white play table
Posted By Main Street

Kids Room Wallpaper Ideas: Peel and Stick Sheets From Nursery to Tween

Children redecorate their own lives about once a year. The dinosaur phase gives way to horses, the horses give way to space, and the wall you painted so carefully at age four is suddenly "for babies." That is exactly why kids room wallpaper in peel and stick sheets makes sense: you get a real pattern on the wall now, and a way out when the next obsession arrives. Here is how to plan it, room by room and wall by wall, from the nursery to the preteen years. Why sheets suit a kids room wallpaper project A full roll of pasted wallpaper is a commitment measured in years. Sheets are a commitment measured in weekends. Main Street's Classic Sheets are 11 x 16 inches (about 1.22 square feet each), sold in 12-packs that cover roughly 14.6 square feet, so you can buy for the exact wall you have in mind instead of a whole room. That small format changes how you think about the space. Instead of asking "which room do we paper?", you start asking "which surface does this child actually look at?" Often the answer is one strip of wall behind the bed, the back of a bookcase or the fronts of a dresser. Most of those can be finished during a long nap. The other advantage is the exit. The sheets are made to peel off cleanly from suitable walls (smooth, clean, painted or sealed), which is what makes them workable for renters and for anyone who suspects the unicorn era has a shelf life. Picking a pattern they will not outgrow by next year The trap with kids peel and stick wallpaper is buying the pattern the child loves today at a scale that dominates the room. A few rules keep the design flexible: Choose a motif, not a character. Clouds, stars, butterflies and botanicals age well. A licensed cartoon does not. Let the background do the calming. A pattern on a white or pale ground reads lighter than the same motif on a saturated color, which matters in a small bedroom. Keep the loud part to one wall. Three plain walls give toys, art and clutter somewhere to land. A few designs from the collection show how that plays out. The Cloud sheets are a watercolor sky in pink, peach and lilac, sprinkled with tiny stars, dreamy enough for a toddler and soft enough that a ten-year-old might keep it. Bohemian Butterflies puts outlined butterflies in teal and pink on a white ground, a livelier pick for a child who wants the wall to say something. For a quieter room, Magic Whimsy scatters small blue wildflowers and butterflies across white, the kind of print that sits comfortably beside wood furniture and a knit throw. Peel and stick nursery wallpaper: plan it around the crib A nursery is the easiest room to paper and the one where placement matters most. Babies and toddlers explore with their fingers, and anything with an edge becomes something to pick at. So the smartest peel and stick nursery wallpaper plan puts the pattern where it can be seen, not reached. Paper the wall facing the crib rather than the wall behind it. The baby gets something to look at, and small hands never meet a seam. Go high on a changing-table wall. A band that starts above the table's reach line gives you color without inviting a project. Finish the order of operations early. If you are painting first, Main Street's own guidance is to wait at least four weeks after painting before any sheets go on. Work backward from your due date and schedule the paint accordingly. Soft palettes suit a nursery, if only because you will be looking at that wall at three in the morning more often than anyone would like. Five layouts that work in real kids rooms 1. The headboard band A rectangle of pattern behind a twin bed does the job of a headboard without the furniture. Hang the sheets upright, four across and two high, and you get a panel 44 inches wide and 32 inches tall. That is eight sheets, so one 12-pack covers it with four left over for pattern matching and the inevitable miscut. 2. The lower half of the wall Paper from the baseboard up to a line at roughly chair-rail height, then cap it with a painted trim strip or a narrow shelf. It gives a playroom the cozy, cottage feel of wainscoting and keeps the pattern at a child's eye level. 3. Inside the bookcase Lining the back panel of a bookcase turns a shelf of picture books into a display. It is also the lowest-risk way to test a pattern before committing a wall to it. 4. Dresser drawer fronts A plain white dresser covered drawer by drawer is one of the most satisfying small projects in any kids room. Sealed or painted wood is on the brand's list of good surfaces, and the fronts are small enough to finish in an evening. Our guide to wallpapering furniture covers the trimming around handles. 5. The closet door A painted, flat door is a ready-made canvas in a room where wall space is taken up by beds and shelves. Leave the ceiling out of your plans, though. However tempting a starry sky overhead might be, Main Street lists ceilings among the surfaces to skip for this paper adhesive. A wall they are allowed to draw on Every parent eventually finds crayon on a wall. A write-on panel gives that urge a legitimate home. Main Street makes two versions in its Craft Paper line, and both come as 11 x 15 inch sheets, slightly shorter than the 11 x 16 wallpaper sheets, so plan the grid separately. Chalkboard Classic takes chalk and chalk markers, the classic choice for drawing, spelling practice and a weekly chore chart. Dry Erase Classic takes dry erase markers. It is not magnetic, so plan on tape or clips for artwork rather than magnets. Six sheets set upright side by side make a band 66 inches long and 15 inches tall. Mount it so the bottom edge sits where your child's elbow lands when standing, and it will stay usable for a couple of growth spurts. Both products are recommended for painted and finished surfaces. We compare the two in more depth in our dry erase wallpaper guide. Wallpaper for a boys room, a girls room, or a shared one Searches split kids rooms by gender, but the patterns that last usually do not. A shared room especially benefits from a design both children can live with. Two approaches work regardless of who sleeps there: Pick a theme, then a color. Sky, garden and woodland themes each come in soft pastels or deeper tones, so siblings can agree on the idea and argue about the shade. Divide with pattern. In a shared room, a band of the same print behind each bed ties the space together while marking whose side is whose. Putting it up (and taking it down later) You do not need a contractor, but you do need a few household tools: a measuring tape and pencil, a utility knife, a smoothing tool and a damp cloth. Main Street's steps are simple: Clean the wall. Wipe away dust, then go over it with a mix of 30% isopropyl alcohol and 70% water. Let it dry completely. Draw a level line. Do not trust the baseboard or the ceiling to be straight; use a level for your first sheet. Peel a few inches and align. Press the top edge to your line, then pull the backing down slowly while smoothing air toward the edges. Trim. Finish the edges with the utility knife. Textured or popcorn walls, brick and stone won't give the adhesive a proper grip, so a smooth painted wall is the one to aim for. When the room's next chapter arrives, peel slowly and at a low angle. Our step-by-step removal guide walks through it. Frequently asked questions What kind of wallpaper is best for a kids room? Removable peel and stick sheets are a practical choice because children's tastes change fast. Pick a timeless motif such as clouds, butterflies or botanicals over a character print, keep the pattern to one wall or one piece of furniture, and apply it to a smooth, painted surface so it goes up cleanly and can come down when the room needs a refresh. Can you use peel and stick wallpaper in a nursery? Yes. Sheets work well on smooth, painted nursery walls, and the Cloud design's own product page lists nurseries among its suggested rooms. Place the pattern on a wall the baby can see but not reach, such as the wall facing the crib. If you have just painted, Main Street recommends waiting at least four weeks before applying. Is peel and stick wallpaper safe for a child's room? Main Street describes its materials on its About page as premium PVC-free paper and low-emission polyurethane, but it does not publish a child-safety certification, so read the product page for anything you need confirmed. Practically, keep seams and edges out of reach of babies and toddlers, since small children tend to pick at corners. Can I put peel and stick wallpaper in a kids bathroom? Not the paper sheets. Main Street lists areas exposed to moisture, including bathrooms and showers, among the surfaces to avoid for them. If you want pattern in a child's bathroom, our bathroom guide explains which products and zones make sense, and why the space around the tub and sink needs a different plan. How many packs do I need for a kids room accent wall? Multiply the wall's width by its height in feet, then divide by 14.6, the approximate coverage of a 12-pack of 11 x 16 inch sheets. A 10 by 8 foot wall is 80 square feet, about 66 sheets, so six packs leave only a few spares. A seventh pack covers trimming and pattern matching comfortably.