








The box a pair of shoes came in is roughly the right size for most of the small things that pile up on a shelf, which is why so many of those boxes never make it to the recycling. Covering a cardboard box with contact paper turns that pile into storage you would leave in plain view, for a sheet or two per box. Below is how to cover a cardboard box with contact paper so the corners stay crisp, the lid still fits and the paper stays put, plus which boxes are worth the effort.
Does contact paper stick to cardboard?
Yes, and it holds better on some boxes than others. Self-adhesive paper grips smooth surfaces, so a shoebox or gift box with a coated, slightly glossy face is the easy case: the paper goes down flat and stays there. Raw corrugated cardboard, the brown kraft kind shipping boxes are made of, is more absorbent and slightly fuzzy, so the adhesive has less to grab. It still works, but press harder and test a corner first, as our surface-by-surface guide to what contact paper sticks to explains.
One thing to know before you start: Main Street's guidance for its 11 by 16 inch wallpaper sheets names painted, sealed and finished surfaces, and cardboard is not on that list. The paper grips coated box board well, but the bond is a one-way trip. Peel it off a kraft box and the top layer of the cardboard often comes with it, so treat a covered box as covered for good.
What you need to cover a box with contact paper
Main Street's own how-to guide lists a measuring tape and pencil, a utility knife, a damp cloth and a smoothing tool. A box project adds a few things from the kitchen drawer.
- Self-adhesive sheets. The 11 by 16 inch wallpaper sheets cover 1.22 square feet each. A box the size of an adult shoebox, roughly 13 by 8 by 5 inches, takes about four sheets including the lid, but measure yours before you count.
- A utility knife, scissors and a straightedge. The knife for trimming against the box edge, the scissors for corner slits, the straightedge for cutting panels square.
- A smoothing tool or an old gift card for pushing air toward the edges and pressing paper into corners.
- A damp cloth. Cardboard holds dust, and dust is what makes edges lift later.
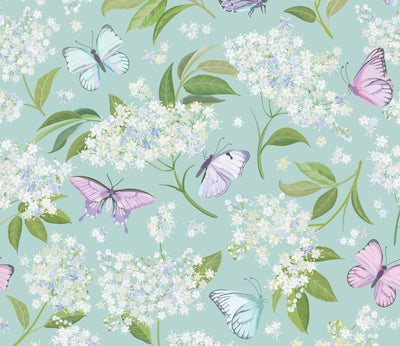
Pattern matters more on a box than on a wall, because a box is small and you see the whole thing at once. A fine, all-over print such as Woven Stripe forgives a seam at the corner and reads as a set when several boxes line up on an open shelf. A large motif works too, as long as you plan where it lands on the lid.
How to cover a cardboard box with contact paper, step by step
Because the sheets are 11 by 16 inches, the cleanest method covers one face at a time and puts every seam on a corner, where the eye expects an edge anyway.
- Prep the box. Pull off tape and labels, press down lifted flaps and glue a loose corner if one has split. Wipe every face with a slightly damp cloth and let it dry fully.
- Measure each face, then add margins. For a side panel, measure its width and height. Add about half an inch to the width to wrap around one corner, and an inch top and bottom to fold over the rim and under the base. Write each measurement on the backing in pencil.
- Cut with the backing on. Lay the sheet face down, mark the panel on the backing and cut along the straightedge. Cutting before you peel is what keeps the edges straight.
- Apply the first long side. Peel back only an inch or two of backing. Line the panel up so the extra half inch overhangs one corner and the margins overhang top and bottom. Press the exposed strip down, then pull the backing away a little at a time while you smooth from the center outward.
- Turn the corner. Run the smoothing tool firmly into the corner so the paper creases on the edge, then fold the half-inch overhang onto the next face and press it flat.
- Cover the remaining sides. The next panel's cut edge sits right on the corner line, over that half-inch wrap. Work around the box this way until the last two wraps meet at the final corner.
- Fold the margins. At the bottom, snip a short slit at each corner, fold the long-side margins under first, then the short ones, like wrapping a gift. At the top of an open box, fold the margin over the rim and press it down inside.
Our guide to covering a book with contact paper uses the same fold-and-tuck logic on a smaller scale, and the same rule applies here: cut generously, then trim.
Corners, lids and handle holes: the three spots that go wrong
Corners
Most lumpy corners come from folding two layers of paper over each other at a right angle. The fix is a slit. Where a margin has to turn a corner, cut from the edge of the paper straight in to the corner of the box, fold one flap down, then fold the other over it. Each flap lies flat instead of bunching. For rounded box corners, and for inside and outside corners on furniture, see how to do corners with contact paper.
Lids
The lid is where a box can stop closing. Paper adds a little thickness, and a snug lid has no room to spare. Cover the lid top and its outer sides, but leave the inside of the lid rim bare so it still slides over the box. On a box that lives in a cubby, consider covering only the lid and the front face, which is all anyone sees.
Handle holes
Archive boxes often have cut-out handles. Cover straight over the hole, then from inside the box cut an X through the paper from corner to corner of the opening. Fold the four flaps through to the inside and press them down, so the cut edge ends up where fingers will not catch it.
Lining the inside of a box, or a tray
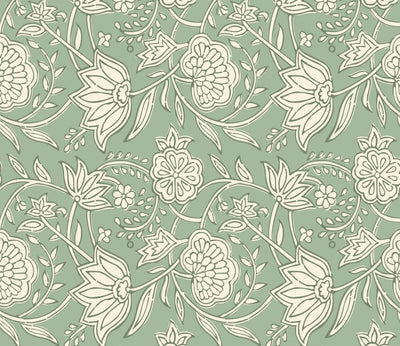
A lined interior is the detail that makes a box feel finished rather than disguised, and it is easier than the outside because nothing has to wrap. Measure the base and each inside wall separately, cut each panel a hair under size so it drops in without buckling, and press from the center outward. A keepsake box with a floral such as Block Print Floral inside the lid is a small, cheerful surprise every time it opens. These wallpaper sheets are paper, so keep lined boxes away from anything damp.
The same method lines the base of a wooden tray, which is what the photo at the top of this article shows. For a tray that will see the occasional cup, Main Street's embossed foil craft sheet Very Crock N Roll is the one to reach for: its product page lists it as water-resistant and suited to functional crafts, which the regular wallpaper sheets are not. It measures 10 by 15 inches, so check the tray base against that before you order.
Which boxes to cover, and which to leave alone
- Shoeboxes and gift boxes with a coated face. The best candidates: rigid, smooth and already box-shaped. A row of them in one print, something like Herringbone, reads as a matched set rather than a collection of leftovers.
- Kraft shipping boxes. Fine for a closet shelf once the flaps are taped flat, but press every edge firmly and expect a lighter grip than on a coated box.
- Boxes that need to fold flat again. Skip these. Paper across a fold line tends to crack or lift at the crease the first time the box collapses.
- Boxes going somewhere damp. Also skip. Main Street's guide lists moisture-exposed areas among the places to avoid for its wallpaper sheets, and a cardboard box under a sink will fail before the paper does.
Once the boxes are covered, label them. A panel cut from a sheet of Chalkboard Classic and stuck to the front face takes chalk or a chalk marker and wipes clean when the contents change, which beats a strip of masking tape. For more small projects that use up a sheet or two, see our guide to craft wallpaper.
Frequently asked questions
Will contact paper stick to a cardboard box?
Yes. Self-adhesive paper holds well on smooth, coated box board, the kind shoeboxes and gift boxes are made of. Raw corrugated kraft is more absorbent, so the grip is lighter; press firmly and test a corner first. Main Street's surface guidance names painted, sealed and finished surfaces, so a cardboard box is a project you do with that in mind.
How do you cover a box with contact paper without bubbles?
Peel only an inch or two of backing at a time and smooth from the center of the panel toward the edges as you go, so air is pushed out ahead of the adhesive. If a bubble is trapped after the panel is down, lift the nearest edge and relay it, or prick the bubble with a pin and press the air out through the hole.
Can you cover a shoebox with contact paper?
A shoebox is the ideal first project: rigid, smooth and small enough that about four 11 by 16 inch sheets cover the base and lid. Cover the lid top and outer sides but leave the inside of the lid rim bare so it still slides on, and put your seams on the corners, where the eye expects an edge anyway.
How many sheets does it take to cover a box?
Measure each face, add about half an inch on one side for the corner wrap and an inch top and bottom for folding, then see how many of those panels fit on an 11 by 16 inch sheet. A typical adult shoebox with its lid comes to about four sheets. Count before you cut, because offcuts rarely rescue a panel that came up short.
Can you remove contact paper from cardboard?
You can peel it, but the result is rarely tidy. On kraft cardboard the top layer of the board often comes away with the paper, and on coated board the surface can scuff. Think of a covered box as permanently covered. If you want a reversible look, cover only the lid, or slip a loose printed panel inside a clear box sleeve instead.
Featured in this article
Shop the wallpapers mentioned above.


How to Cover a Cardboard Box With Contact Paper, Lid Included

Wrapping Paper as Drawer Liner: How to Do It, and When Not To

Does Shelf Liner Attract Bugs? What Really Draws Pests to Your Shelves

How to Make a Stencil With Contact Paper for Crisp Painted Lines

Chalkboard Paint vs Chalkboard Wallpaper: Which Writable Wall Should You Choose?


